How to set up the Digital I/O with Source-Connect Pro and and Pro Tools
Note: This tutorial is not designed for the more recent MacPro systems called ‘Nehalem’ (late 2008). You will need to use an external digital source like an M-Audio transit, then choose this device as your core-audio I/O in System Preferences. This is because Nehalem computers do not lock their digital output to the clock they are receiving from their digital input and will cause clicks in your I/O. Contact us for more information.
Before you start: You will need to connect your Digi192/96 to your optical I/O on your Mac using an optical cable. See "Connecting the Digital I/O to your Digi 192/96 " (down below) for a diagram on where to connect the cable.
Step 1: Create a new session or open an existing session and modify accordingly.
Step 2: Go to Setup -> hardware. 
Step 3: For whichever 192 or 96 you are using, the digital format needs to be OPTICAL S/PDIF. You also need to set your macOS clock to lock to your Pro Tools internal clock via the Audio Midi setup application (Applications/Utilities). 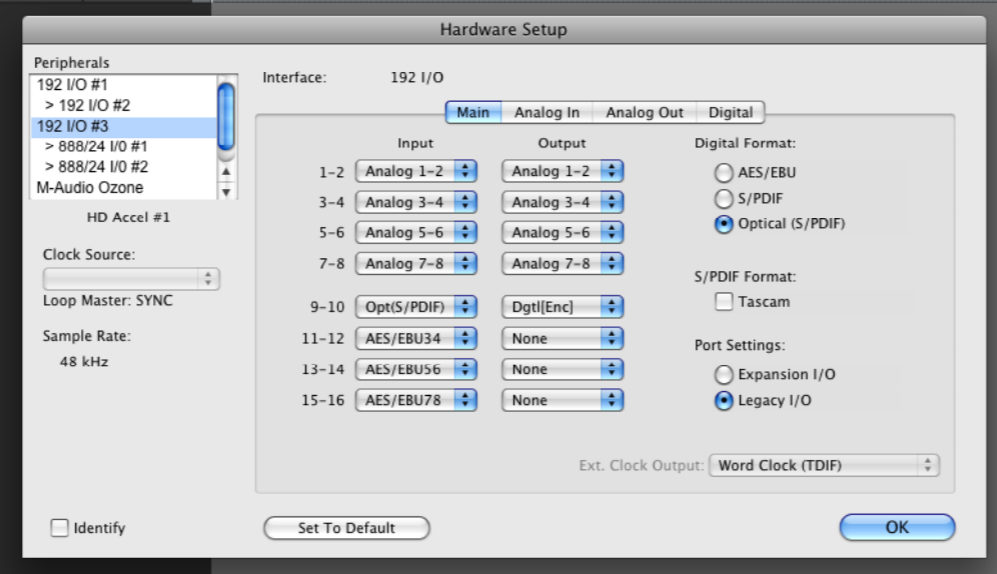
Step 4: Now go to Setup: I/O. 
Step 5: Select the Input tab, Make a new path, mono or stereo, whatever you need, and give it a name. In our example we have more than one 192 and we are using 192 #3 in our example. So, we choose that 192 and then the S/PDIF port on the enclosure of the 192. Make sure to select this as your Left and Right inputs for this path. 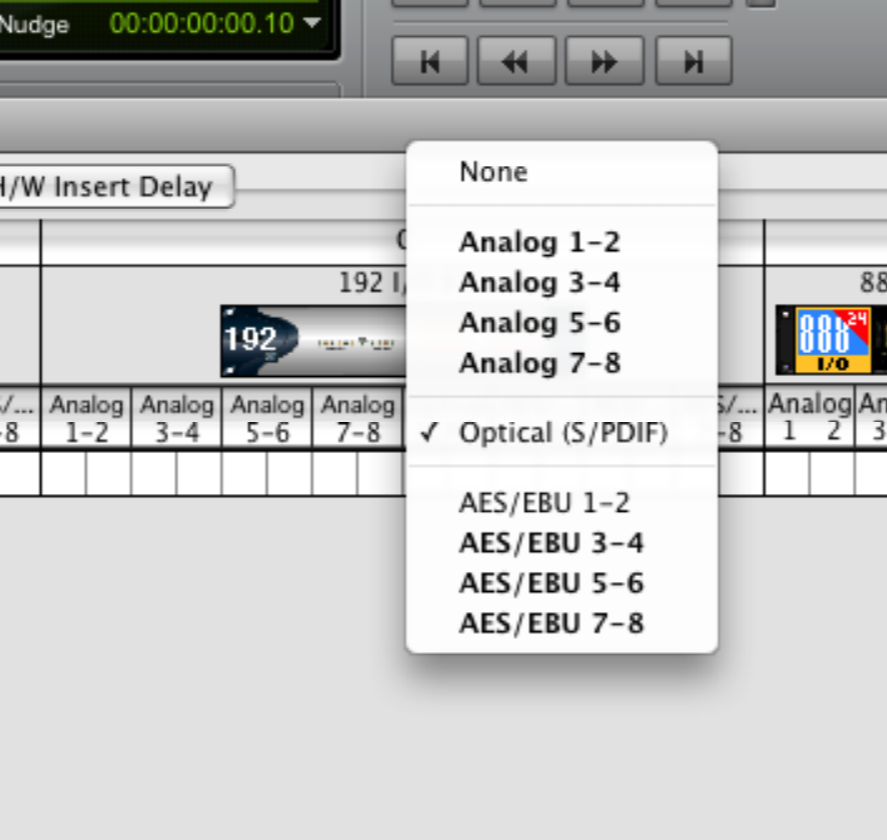
Your I/O input tab should now look something like this: 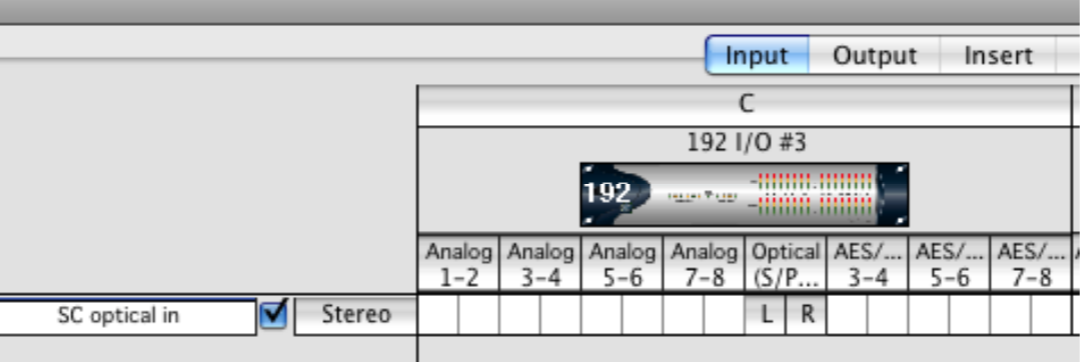
Step 6: Now go to your Output tab and make a new path. When you select your 192 it is not going to say optical, it will say 'Digital enclosure all formats' because it is an output. Also make sure to select your Left and Right outputs for this path. 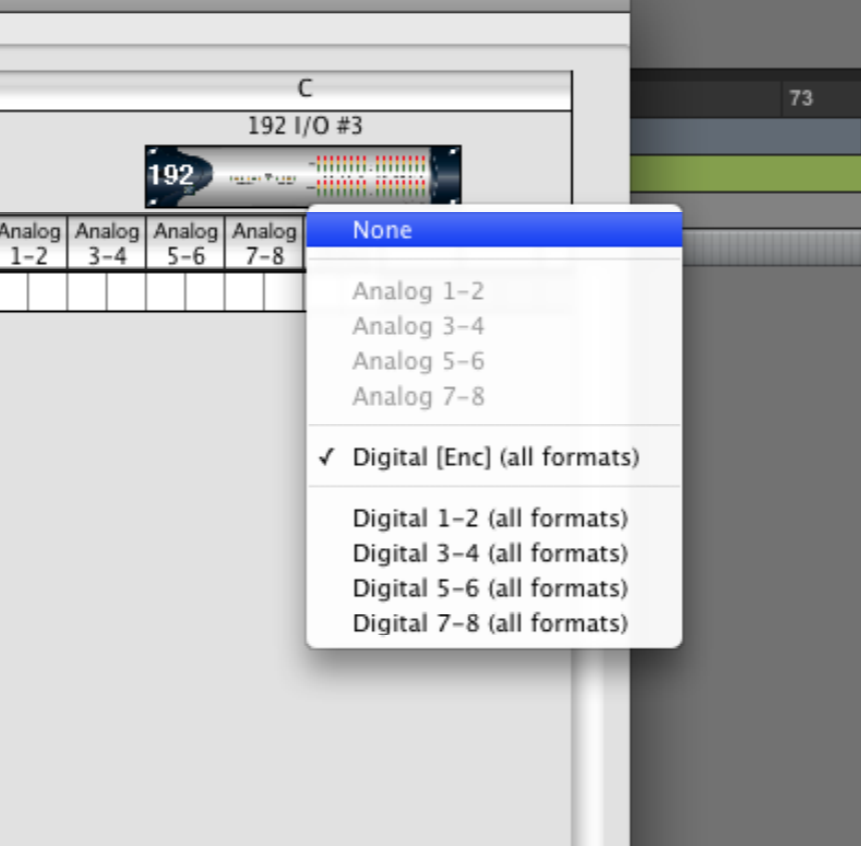
Now you have completed your I/O setup. The remainder of this tutorial is to connect Source-Connect Pro 3.5 and Pro Tools with your digital I/O setup.
Step 7: Create two stereo aux inputs in your Pro Tools session.
Step 8: For the inbound signal make the input to the first aux your ‘SC optical in’ path, and send the output to a bus. You will route this output to your record track, for example, for recording whatever signal is received from Source-Connect. You could also set the input of SC directly into a record track if you don’t need the flexibility.
Step 9: On the second aux select your talkback mic for the input or whatever you want to send to your Source-Connect partner and set the output of that aux to your optical out (in our example we named ours ‘SC optical out’).
This is what will be sent to Source-Connect to be heard by your connection partner.
Below is an example of the I/O from our new session:
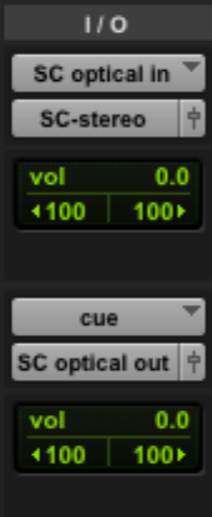
Make sure to use the Source-Connect busses ONLY for Source-Connect to maintain Q fidelity. The output of your fader must ALWAYS be set to 0 and pan hard left and hard right.
You can alternately feed the optical signal directly into a record track from this path to ensure Q fidelity.
Step 10: Finally, select your Digital In and Digital Out in Source-Connect Pro 3.5.1 or higher. If you have the correct routing in Pro Tools you will see the level meters reflecting your signal. 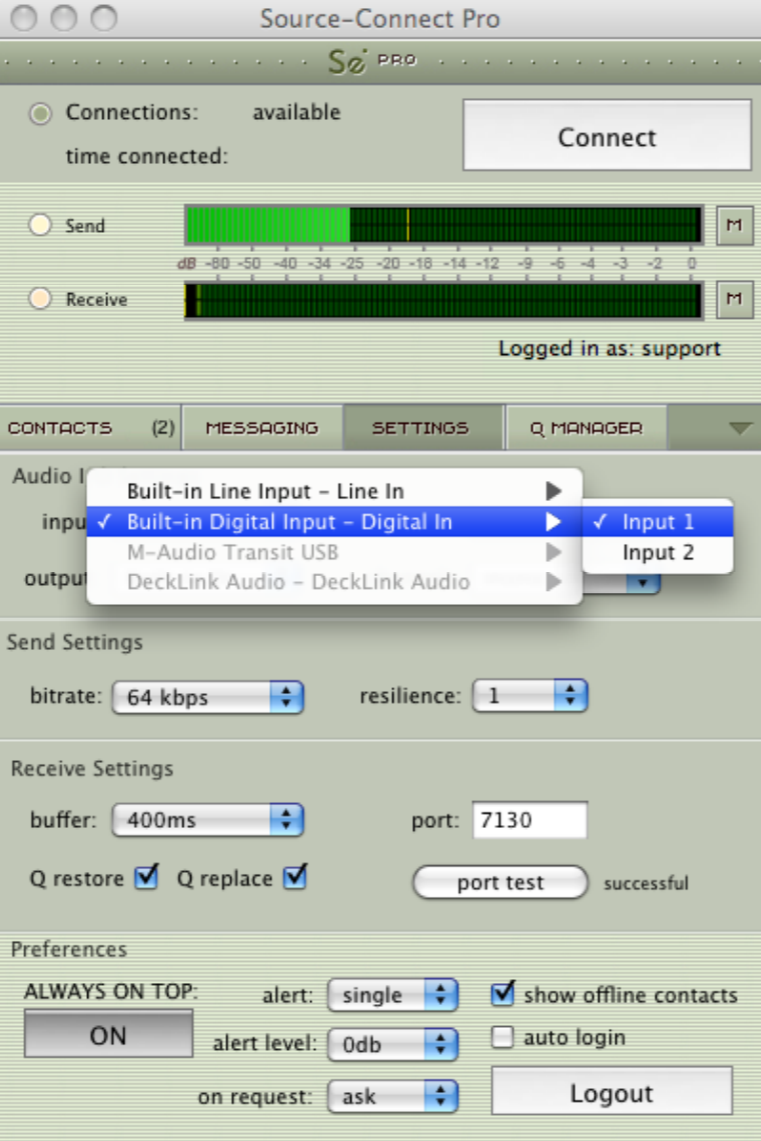
Connecting the Digital I/O to your Digi 192/96
The Digital I/O connectors are found to the right of the chassis. See the image below, the correct ports are circled in red. Make sure you are not connecting your ADAT ports. 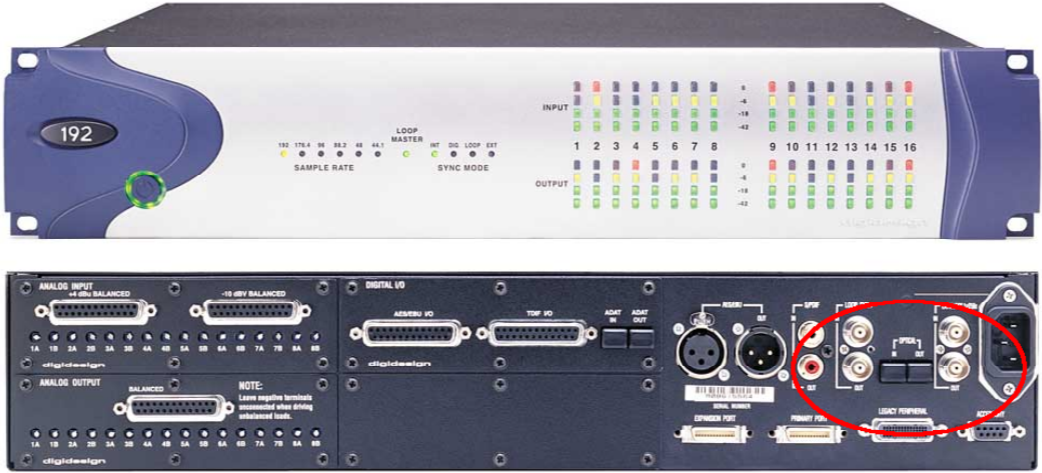
Working with Digital I/O and newer Intel Mac Pros
The following outlines a recommended method for working with your digital I/O and Source-Connect when interfacing with Pro Tools HD and Nehalem or later Mac Pros, to resolve potential clock issues.
1. Send the optical out of your Mac Pro into an M-Audio C02.
2. Send the SPDIF/ COAX out of the M-Audio C02 into a 75ohm to 110ohm balancing transformer, such as the Switchcraft 366 Adapter, AES-EBU FXLR-BNC. This will make the COAX SPDIF look like AES.
3. Send the AES out of the balancing transformer into one of the main 8 AES inputs on the Digi192.
4. Send the 192 chassi optical output directly into the Mac.
Make sure you use the correct optical output: it is on the chassi to right side of the 192 near the power plug. It is NOT the ADAT optical port (near the center of the 192) or the signal to the Mac won't work at all.
SUMMARY:
IN:
- Coming out of the Mac Pro optical
- Going into C02
- Coming out as coax
- Going into the balance transformer
- Going out of the balance transformer
- Into one of main 8 input AES pairs
OUT:
- Chassis SPDIF optical out to optical in on the Mac Pro
Links:
Table of Contents