Lifecycle of a recording
This article is part of the Source-Connect Standard 3.9 User GuideThis section is a step-by-step guide to why you would want to use Source-Connect with AutoRestore. It shows how the Q Manager works by describing the ‘lifecycle’ of a file recorded in Pro Tools and the subsequent restore and final replace process.
1. Request a Source-Connect session
When you request a Source-Connect session with a Source-Connect Pro user, you will be shown a dialog indicating that you are requested to send Restore data. 
2. Ready to record
Once you accept you have now established a Source-Connect session with Restore enabled. You should now see a Q icon to the left of the Send meter, indicating that you can send Restore data. 
3. Recording an audio file
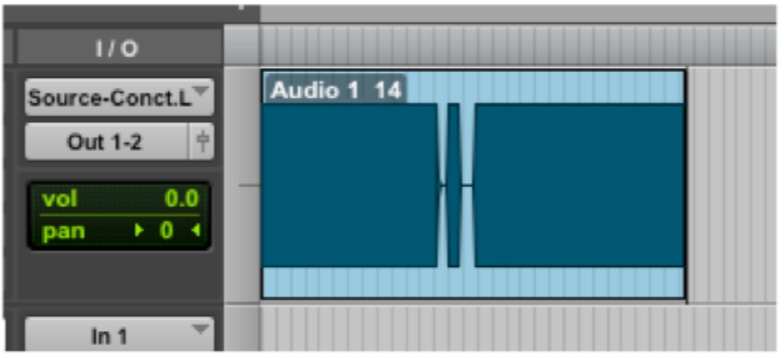
In this example we are sending a sine-tone signal via the Signal Generator plug-in to be recorded, and for the purpose of demonstration we are causing a significant number of dropped packets. You can see on the waveform in the timeline when the recording is significantly degraded: this is the audio received by your connection, and the drop-outs are caused by an unstable internet connection.
What your connection partner sees when recording a drop - out:

IMPORTANT: If your connection partner is not sure on how to record with Restore enabled, please refer them to the Source-Connect Pro documentation or contact Support for a demonstration. It is recommended that all Source-Connect Pro user enable Auto-Restore to ensure perfect recordings, every time.
4. Restoring the audio file in the background
Once you stop recording the Q Manager on the other side will start the restore process if required. Your connection partner can continue recording multiple files as the restore process does not interrupt your session in any way.
5. Taking a look at the restored file
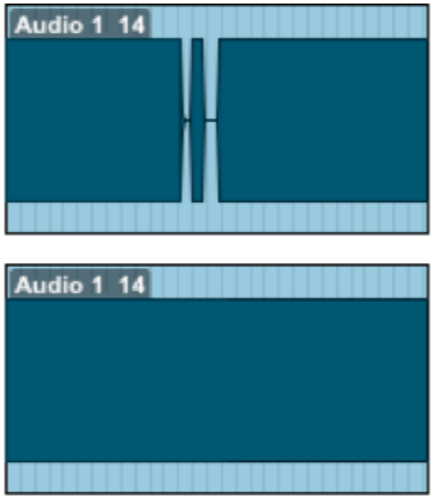
Since we have recorded a sine-tone signal, it is simple to see visually how the restore process works. If your connection partner selects the filename in the Pro Tools bin and chooses ‘Recalculate waveform overviews’ they can now compare the files before and after the restore process visually:
Before and after the restore process:

They can now see (and hear on playback) that they have a completely restored audio file with perfect playback.