How to fix a black screen when streaming a window or the desktop in Source-Live Pro LL
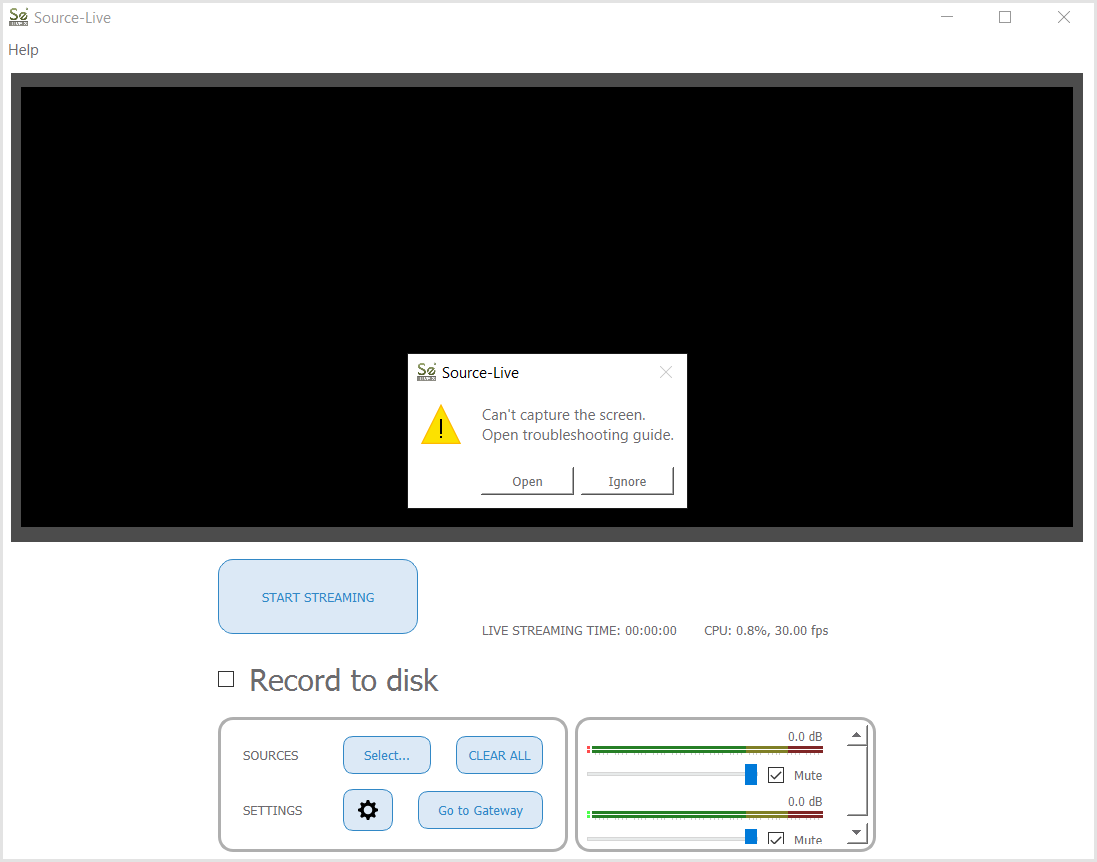
This article contains troubleshooting informationCan't capture the screen. Open troubleshooting guide.
Source-Live | Low Latency Version | Windows
Description
Users trying to capture their desktop or an application window are faced with a black screen when starting the stream. The following error message comes up:
Cause
Depending on your Windows version, you may need to set Source-Live to run on a specific graphics card to be able to stream a desktop or an application screen.
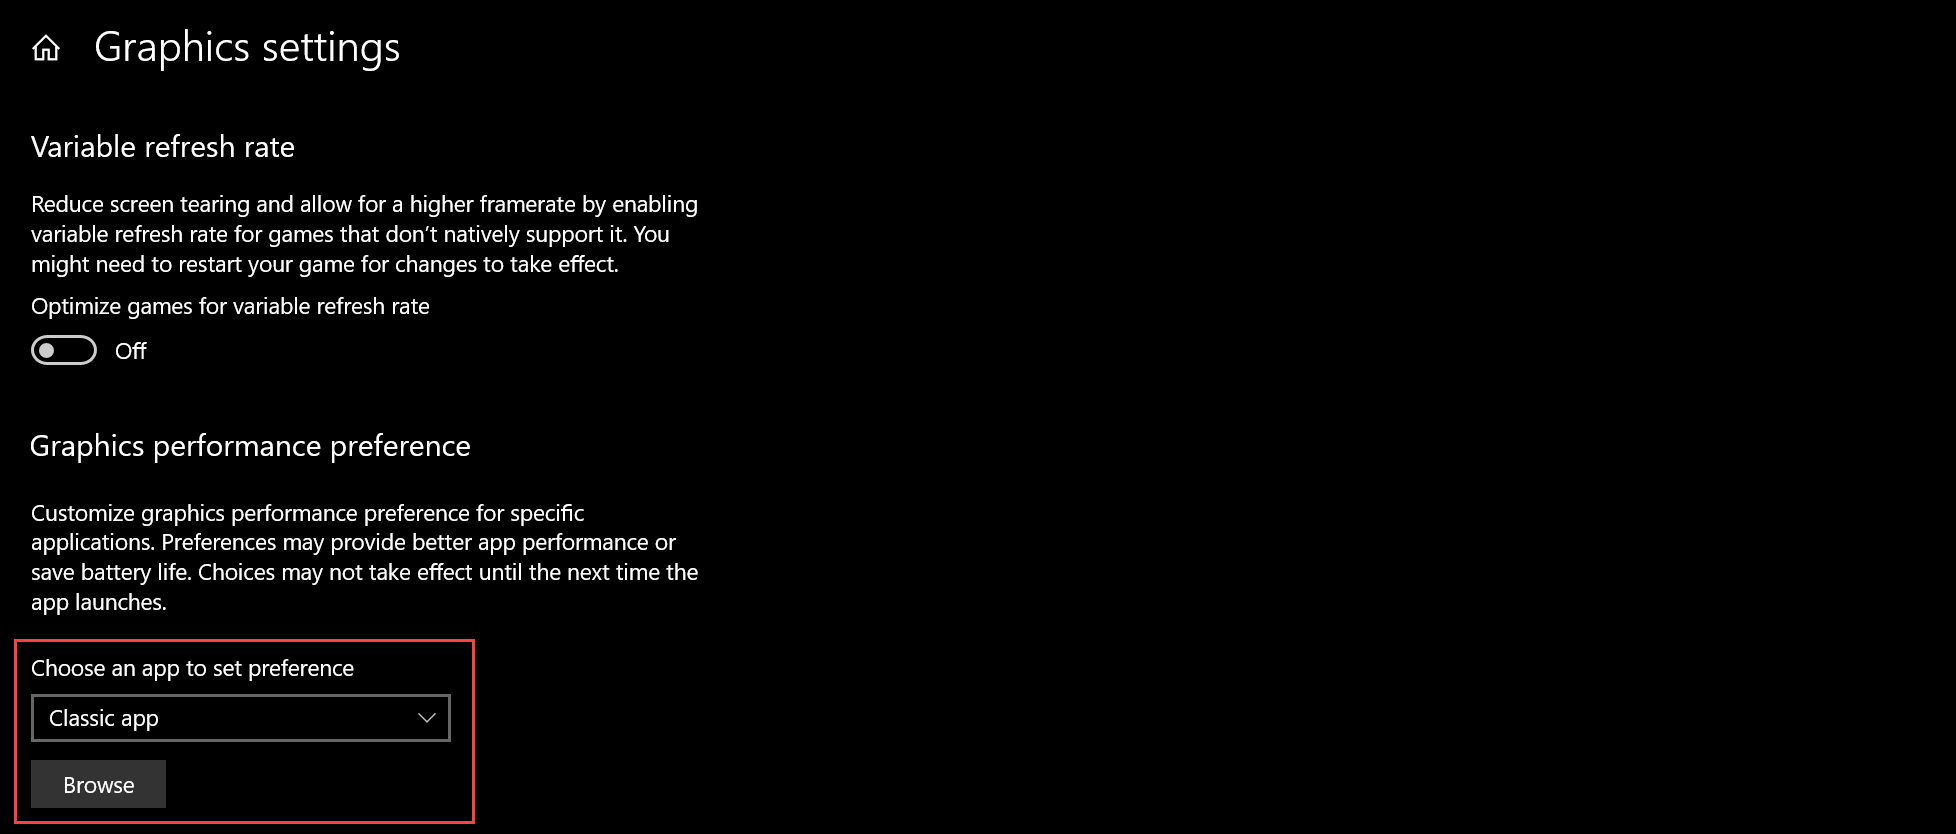
If you are on Windows version 1909, Build 18363 (or above), you can solve the Capture screen issue directly from the Graphics settings menu.
Actions - Windows 10 - Graphics Settings menu
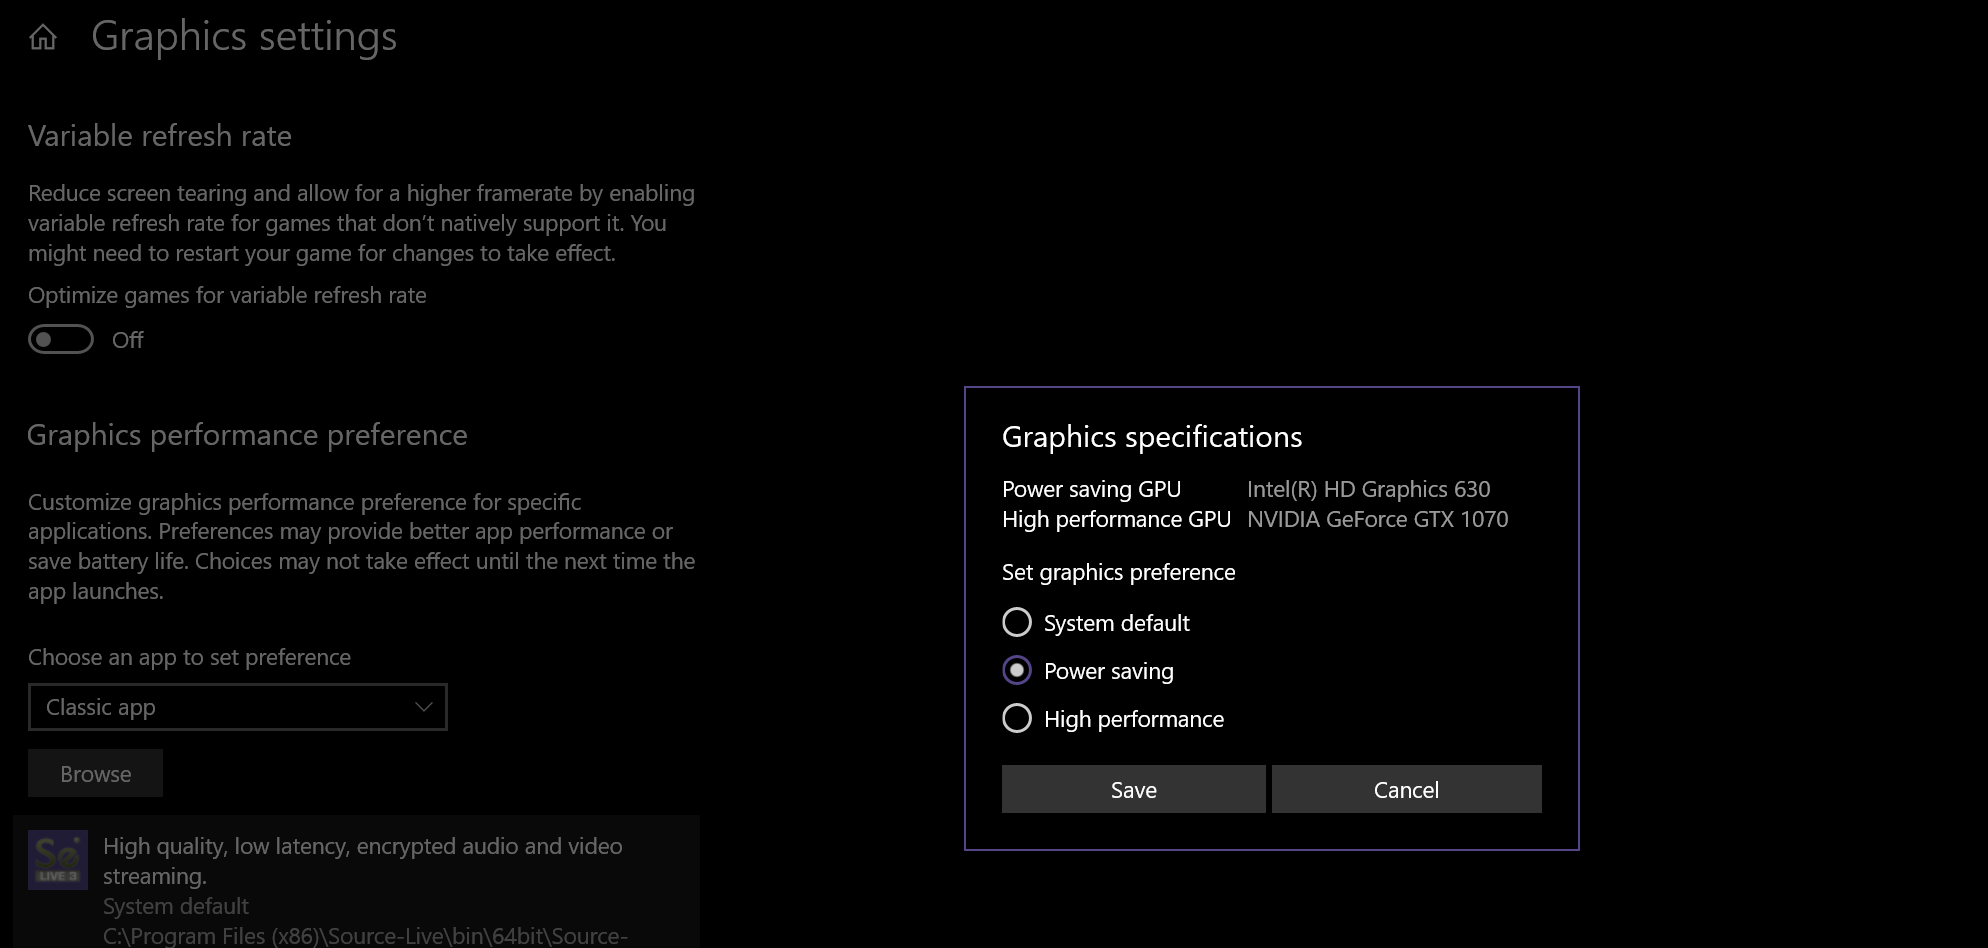
For users on Windows 1909 build 18363 and above:
- Click the Start Menu.
- Type in Graphics Settings.
- In the Graphics settings menu, click "Browse" under “Choose an app to set preference”
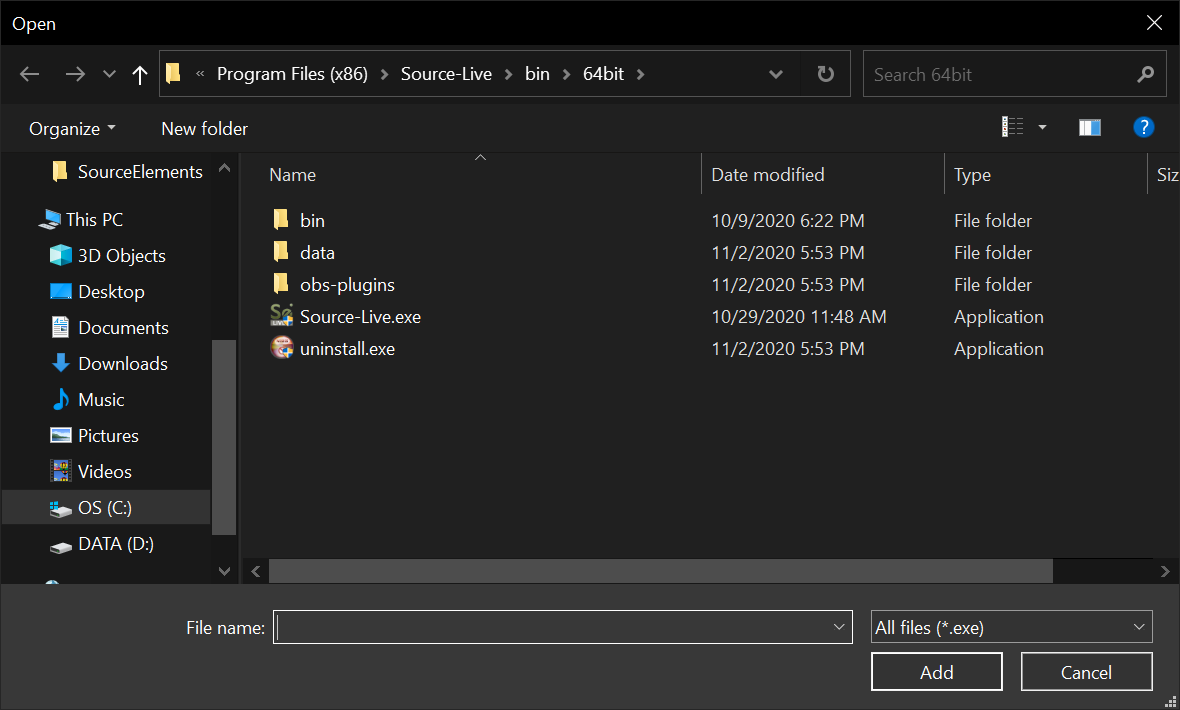
- Navigate to the Program Files > SourceElements > Source-Live folder and select the executable file.
- In the new menu, click "Options".
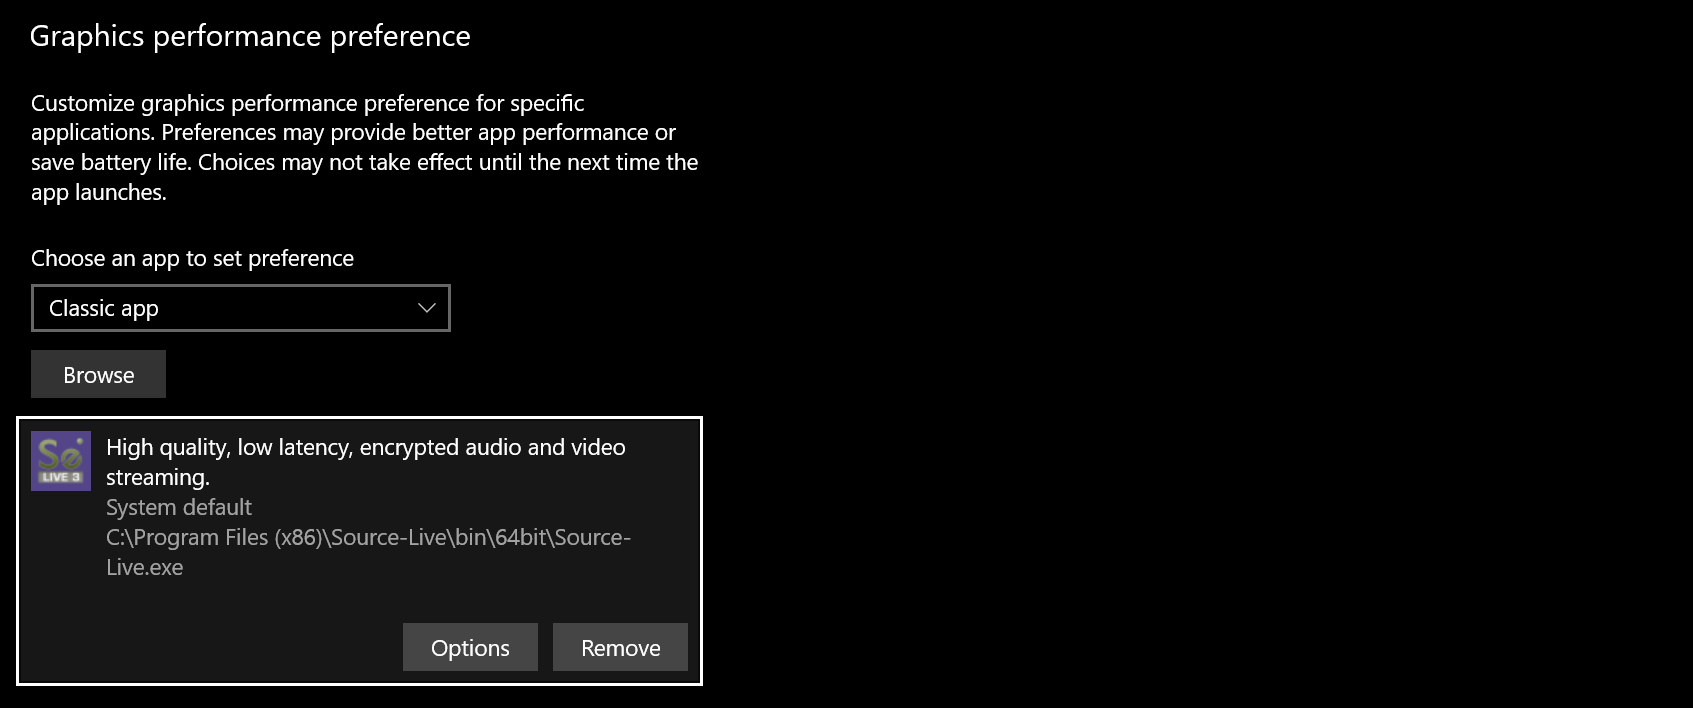
- Select "Power saving" to use the built-in Intel graphics card, or "High performance" to use an external graphics card instead.
Actions - Windows users with NVIDIA Cards
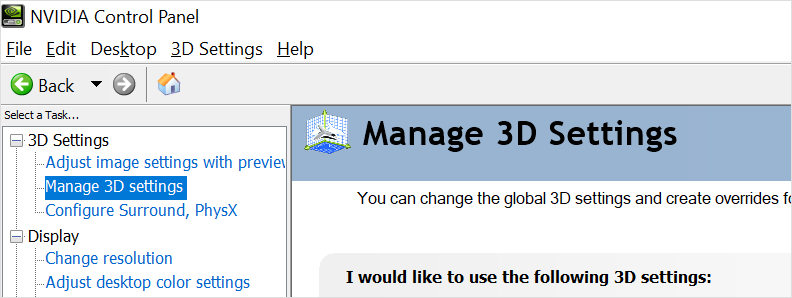
For users with NVIDIA graphics cards on Widnows versions older than 1909, build 18363
The issue with the black screen can also be solved by going through the NVIDIA Control Panel for configuration. The location of the Control Panel varies depending on each graphics card, but you can:
- Right click on your computer's desktop and select "NVIDIA Control Panel"
- Install NVIDIA Control Panel through the Microsoft Store
Once ready, open the NVIDIA Control Panel and:
- Go to 3D Settings > Manage 3D settings.
- Click "Program Settings" > Add > Browse.
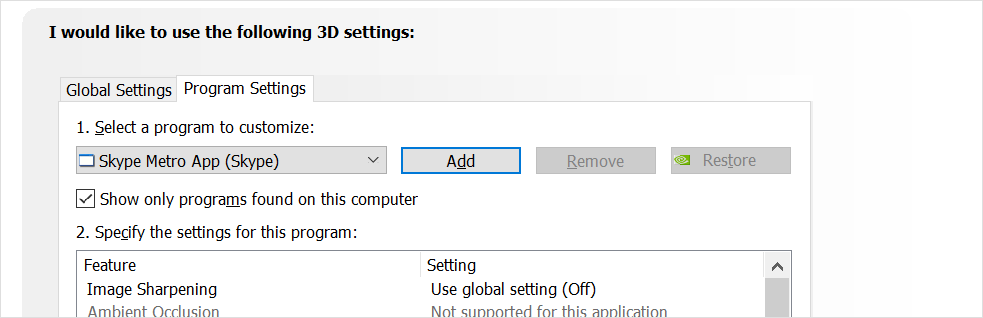
- Browse and select Source-Live 3-LL.

- Click "Low Latency Mode" and set it to "On".