Managing Custom Devices on Windows
This article is part of the Source-Nexus I/O and the Source-Nexus Control Panel User GuidesFor Windows, custom audio devices are created when installing the application. The devices will automatically be named Source-Nexus A, B, then Source-Nexus 3, 4, 5, and so on. You can later add additional devices using the installer.
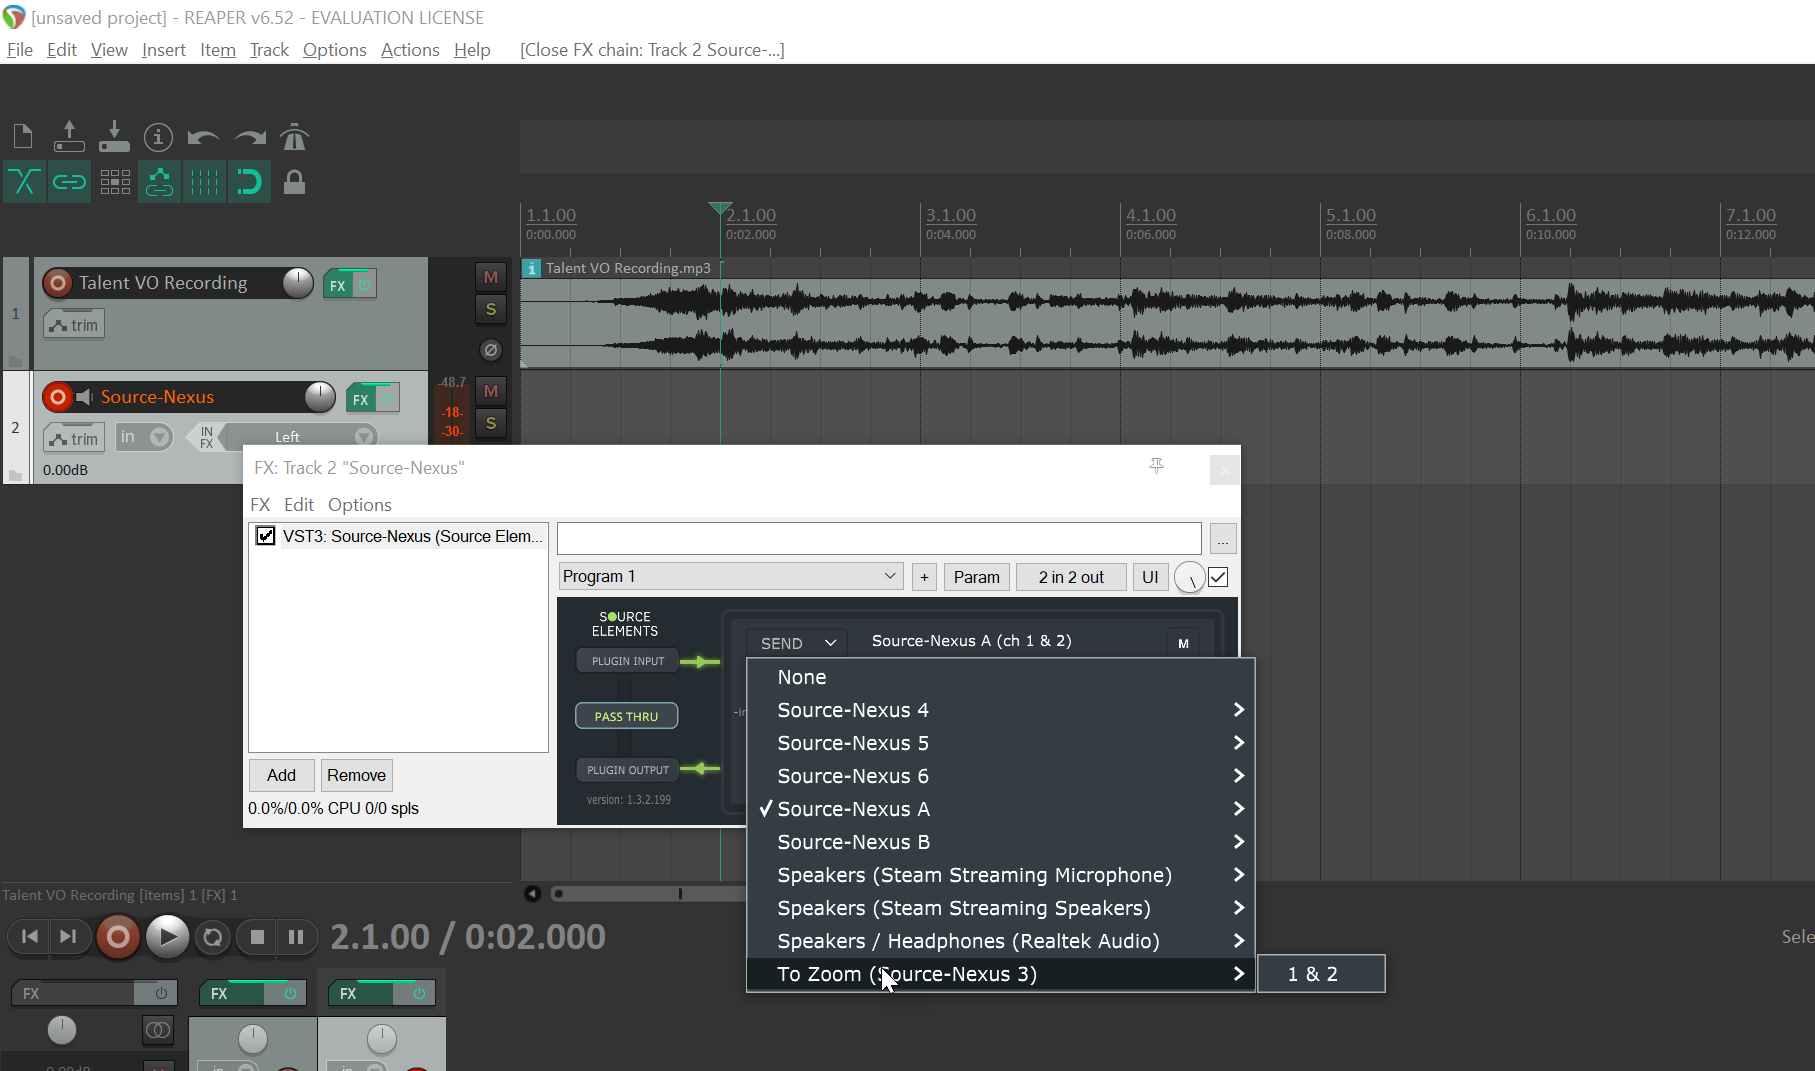
You can use the the devices created in Source-Nexus Control Panel in any software such as phone applications, metering, encoders, decoders, external processors, other audio workstations, video editors, or even browser web pages. With up to 64 channels, and with multiple devices and channels, there is no limit to application routing.
For instructions on how to create devices on a Mac computer, visit the Source-Nexus Control Panel topic instead.
Creating Devices while Installing
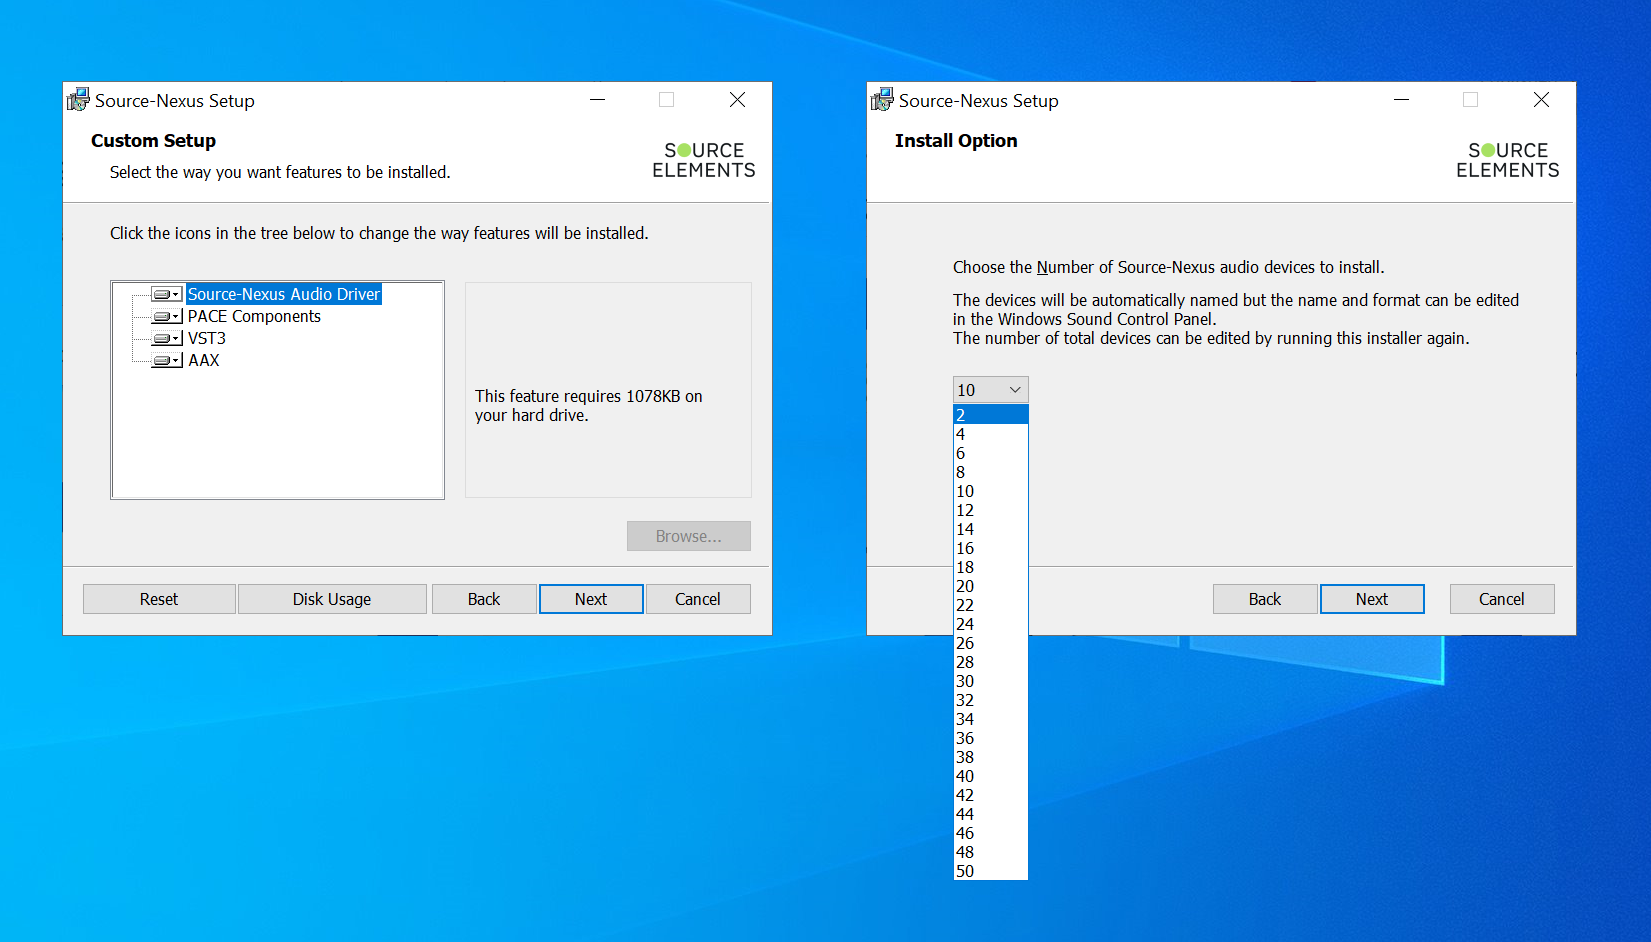
In order to create new devices while installing the application:
- Open the Source-Nexus I/O installer.
- Advance until the “Choose the Number of Source-Nexus audio devices to install”.
- Select how many devices you wish to have installed.
- Complete the installation process.
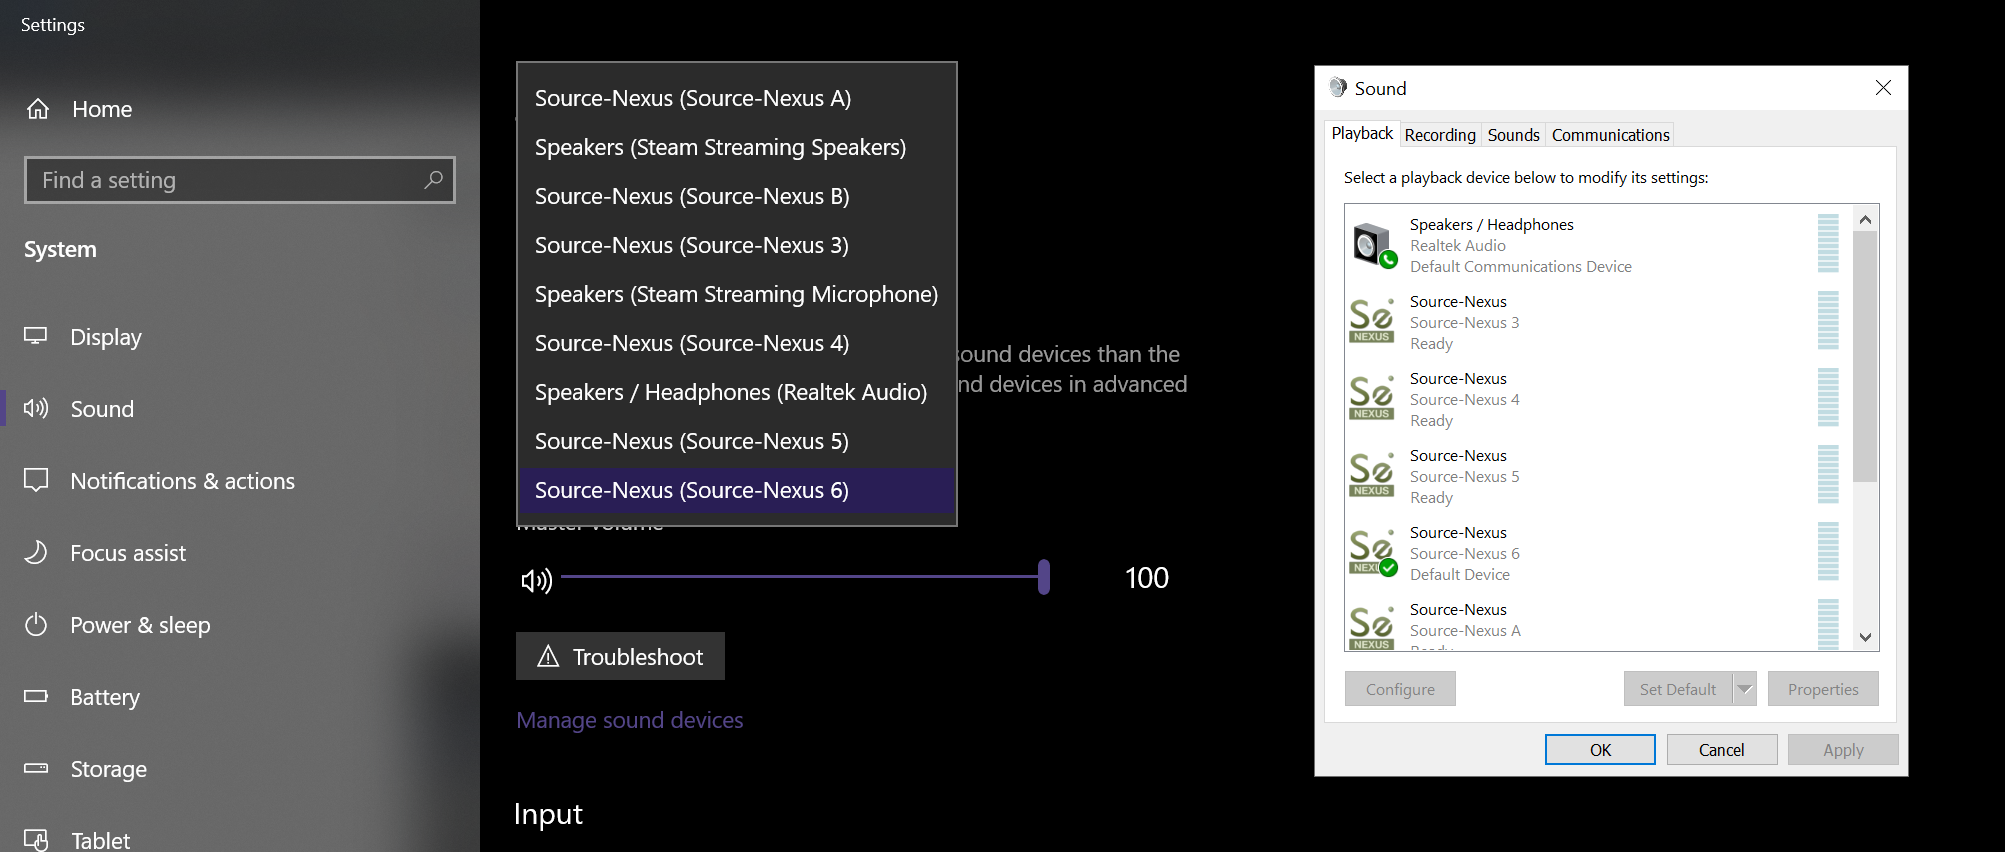
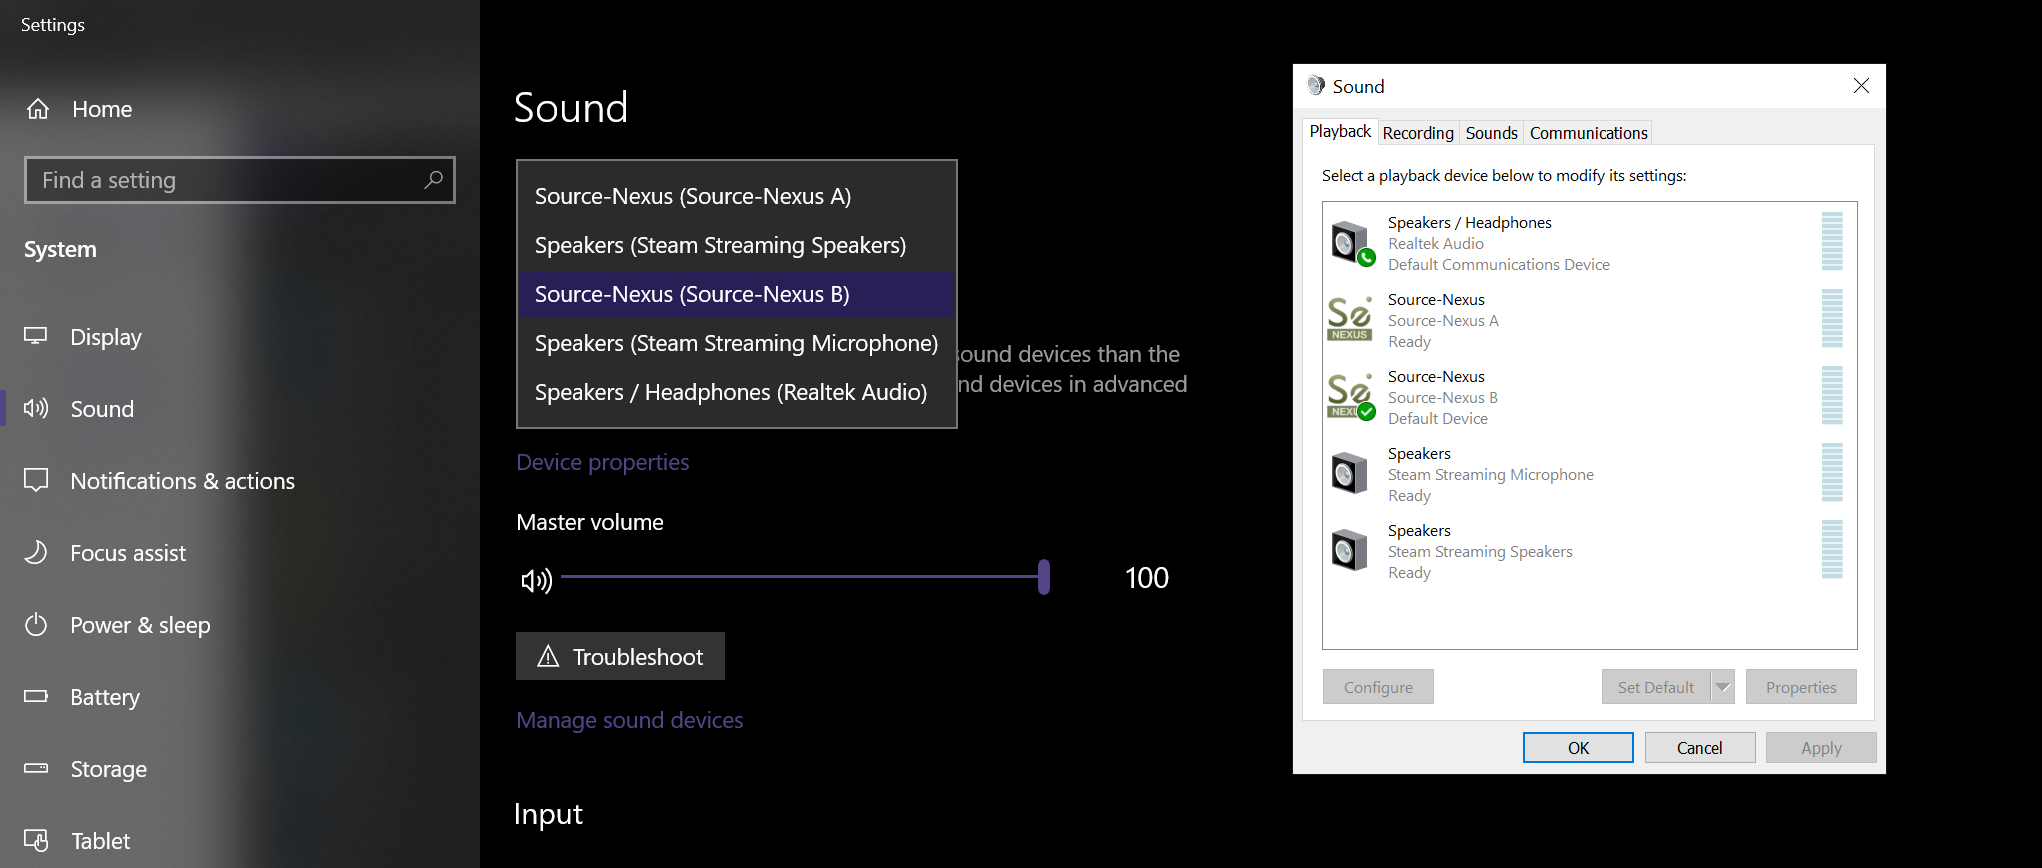
You will see the new devices in both the Sound Settings menu and the “Manage audio devices” dialog in the Windows Control Panel.
Creating Devices after Installing
In order to add more devices after installing the application:
- Open the Source-Nexus I/O installer and click “Next”.
- Select the “Change” option.
- In “Custom Setup”, click “Next”.
- Select the number of devices you want to have installed. The original devices will not be removed.
- Complete the installation process.
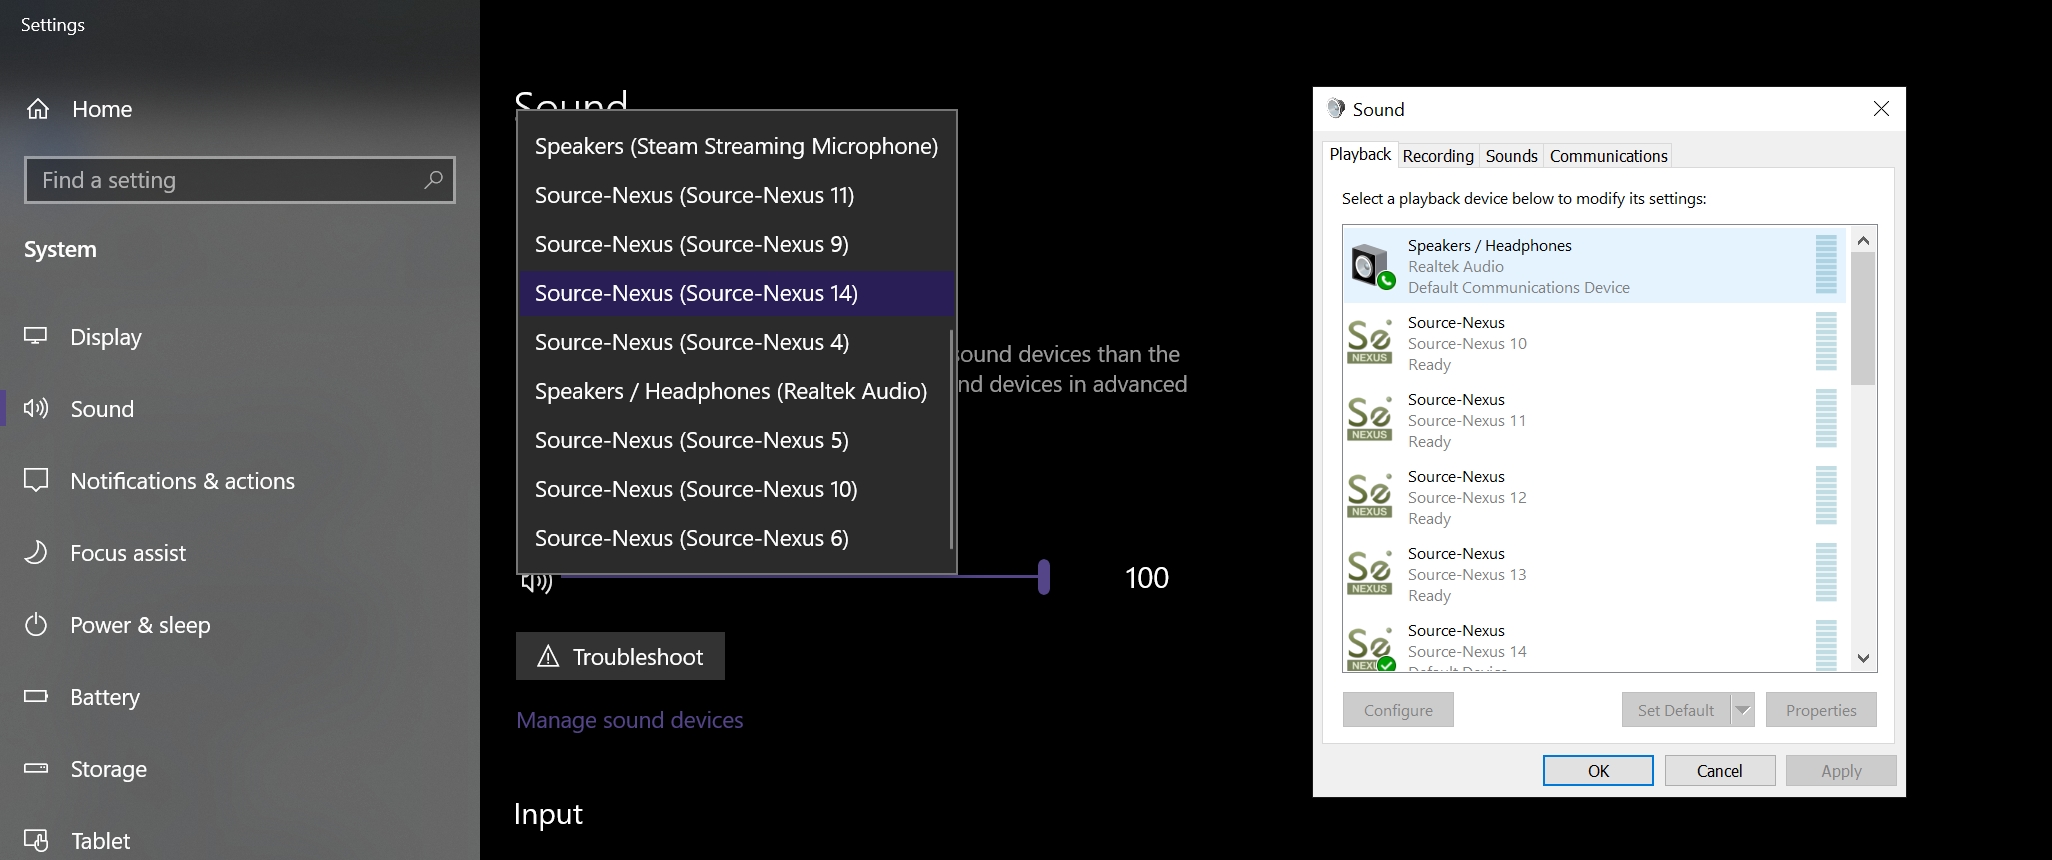
You will see the devices you already had plus the new devices in both the Sound Settings menu and the “Manage audio devices” dialog in the Control Panel.
Renaming Devices
In order to rename any Source-Nexus I/O devices:
- Go to Control Panel > Sound.
- Under Playback, select the Source-Nexus I/O device you wish to rename.
- Click "Properties".
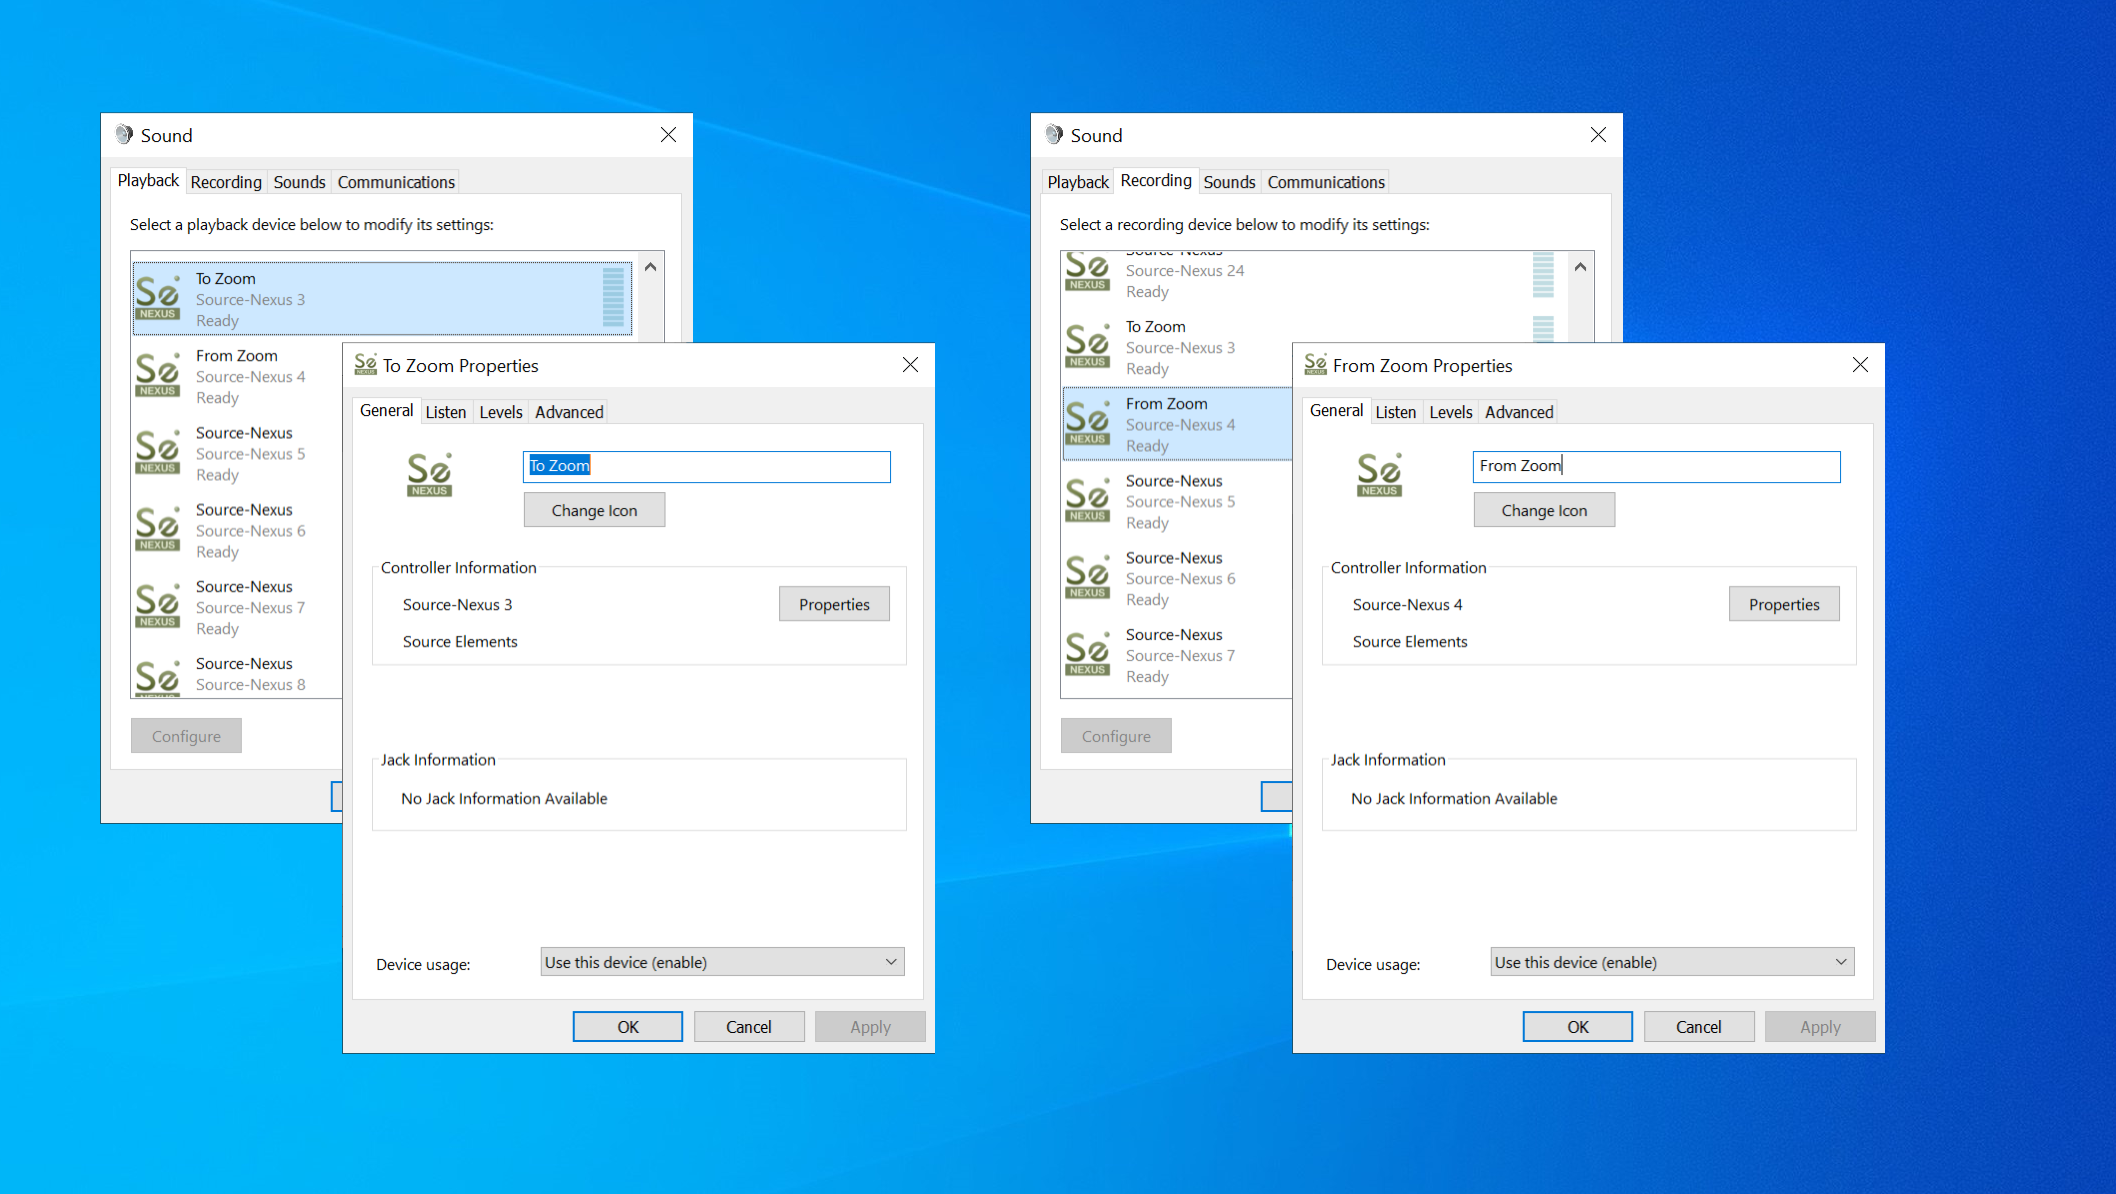
- Rename the device to something like "To-APP".
- Under Recording, select the same Source-Nexus I/O device.
- Click "Properties".
- Rename the device to the same thing it was renamed to under the Playback tab. It is very important to give the device the same name under both the Playback and Recording tabs.
This will show up with the corresponding name in your application.
Deleting Devices
In order to delete devices:
- Open the Source-Nexus I/O installer and click “Next”.
- Select the “Change” option.
- In “Custom Setup”, click “Next”.
- Select the final number of devices you want to have installed.
- Complete the installation process.
The devices will be removed from the Sound Settings and the “Manage audio devices” dialog in the Windows Control Panel.
Cross-Communication with Mac
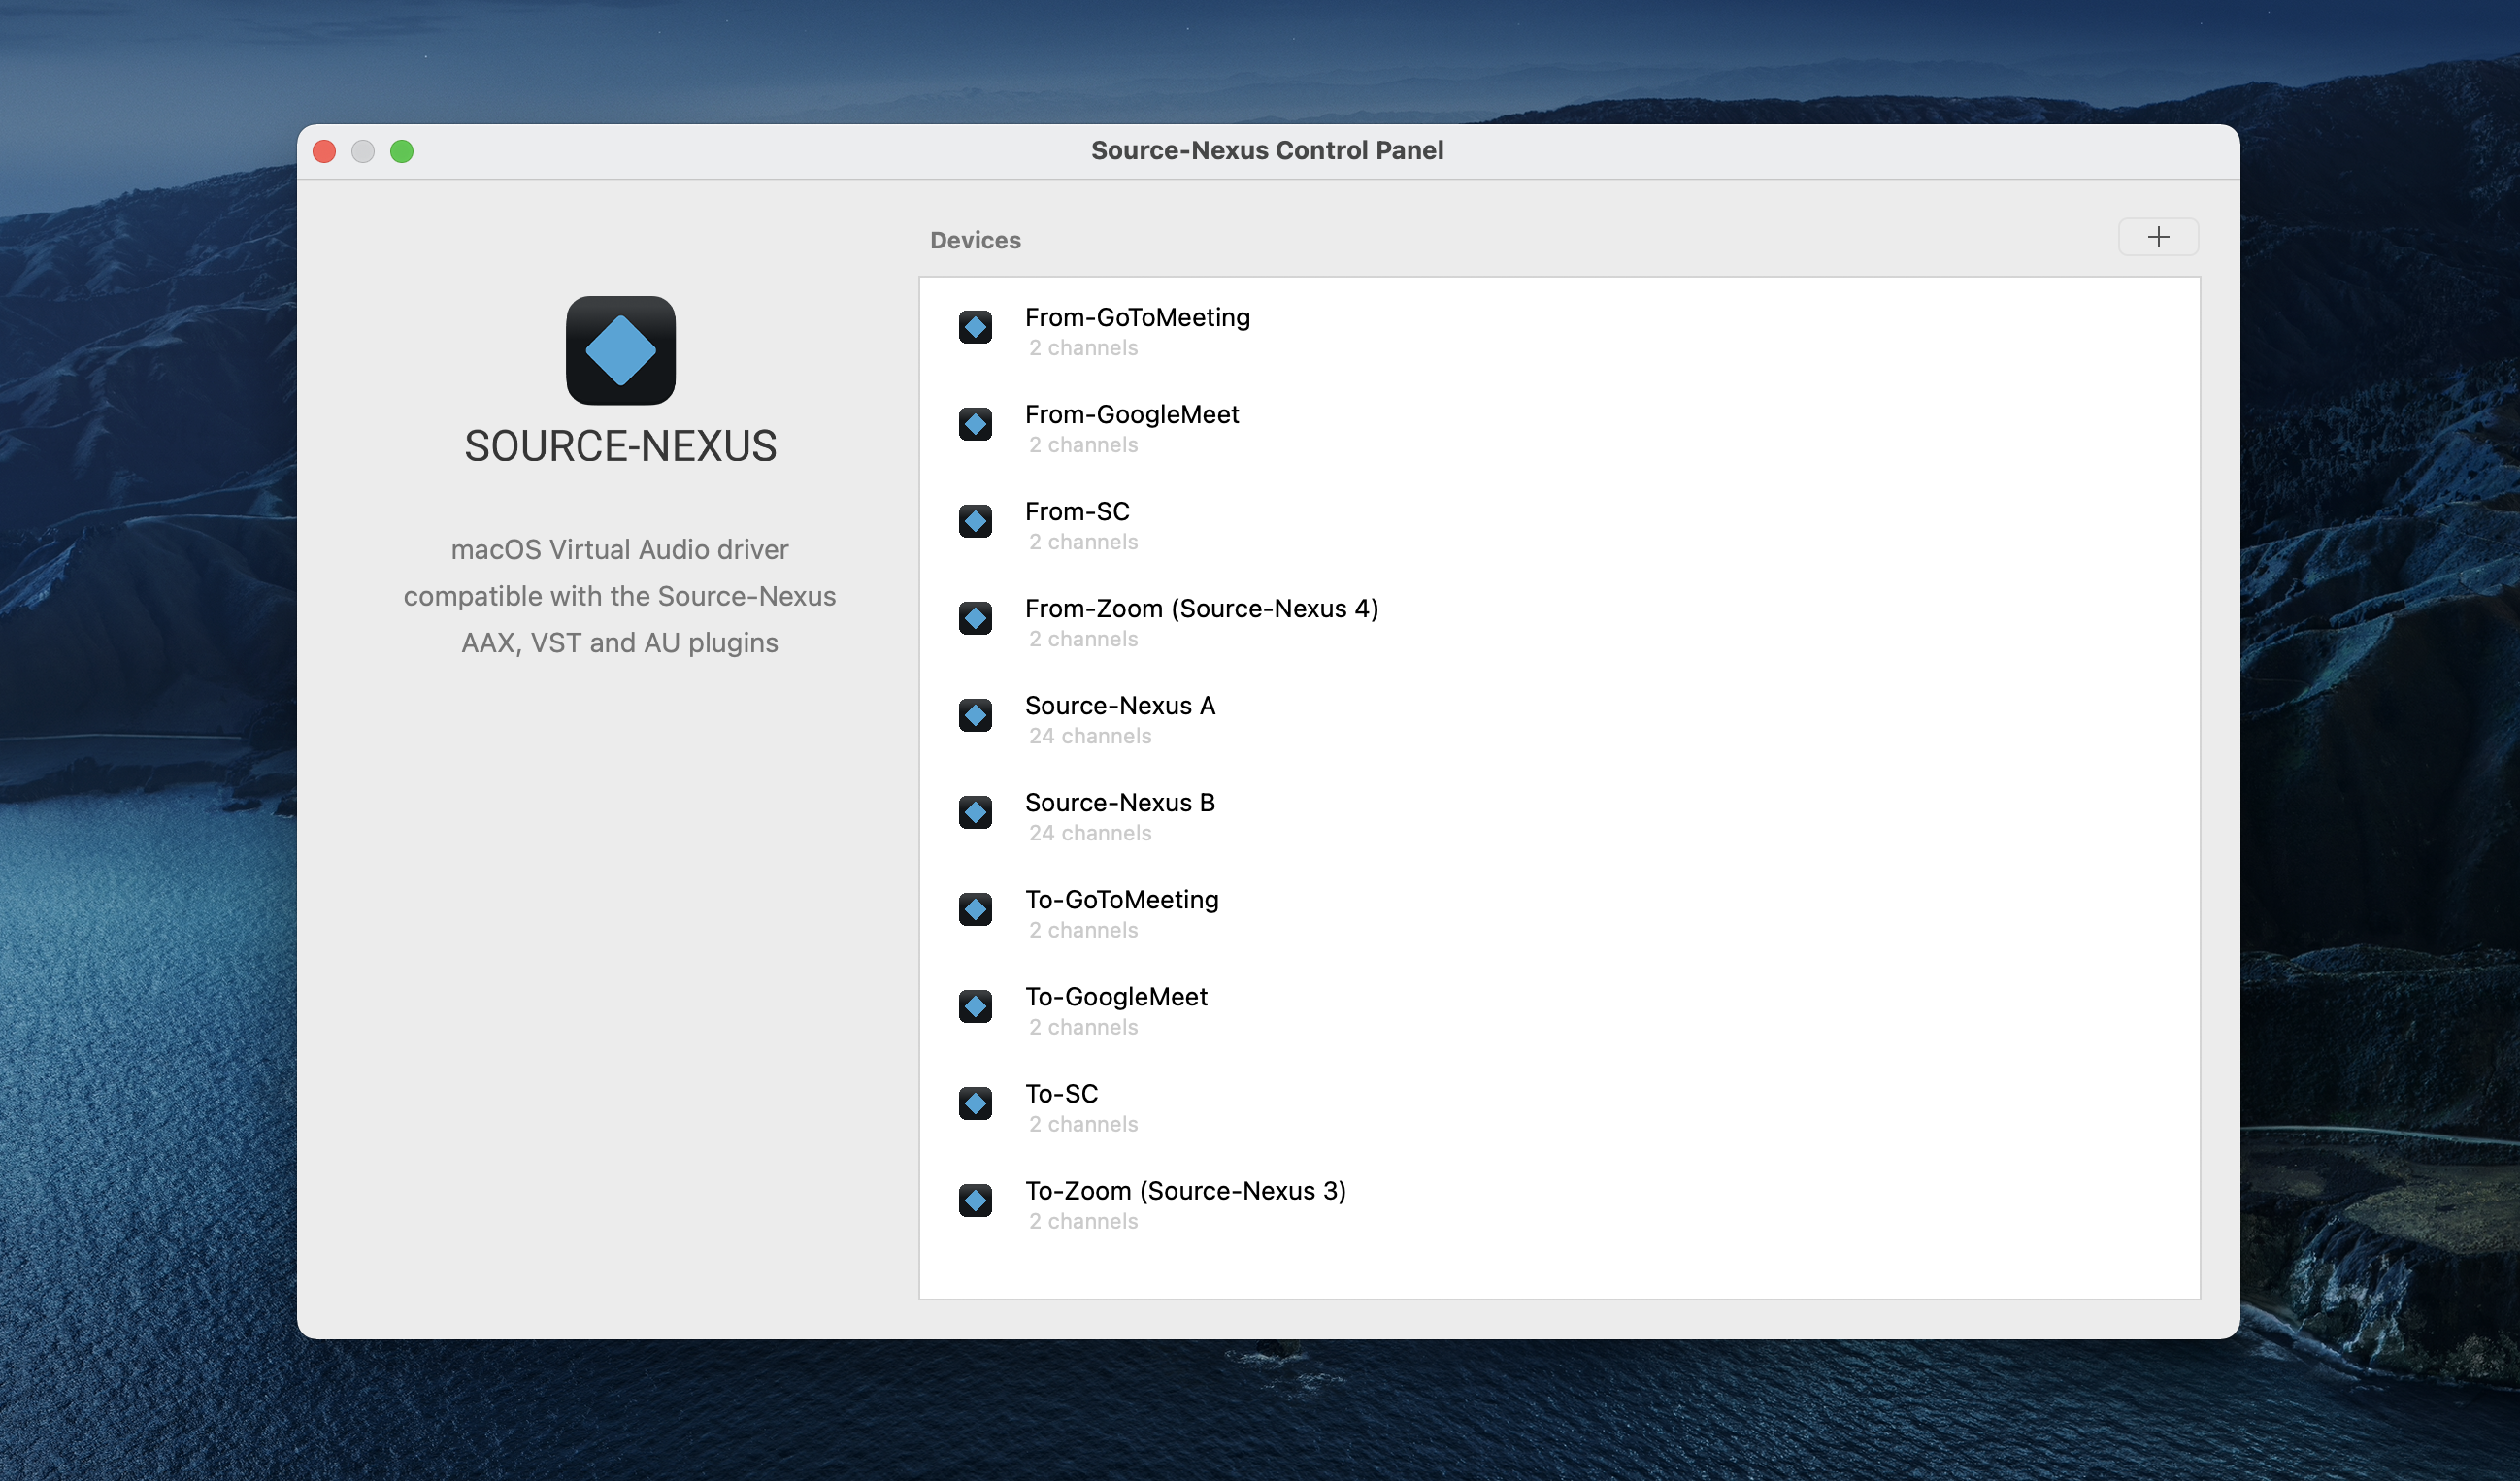
If you plan on using a DAW session with a Source-Nexus I/O device you created on Windows on Mac, you will need to take care of naming the devices exactly like they would need to name them on Windows.
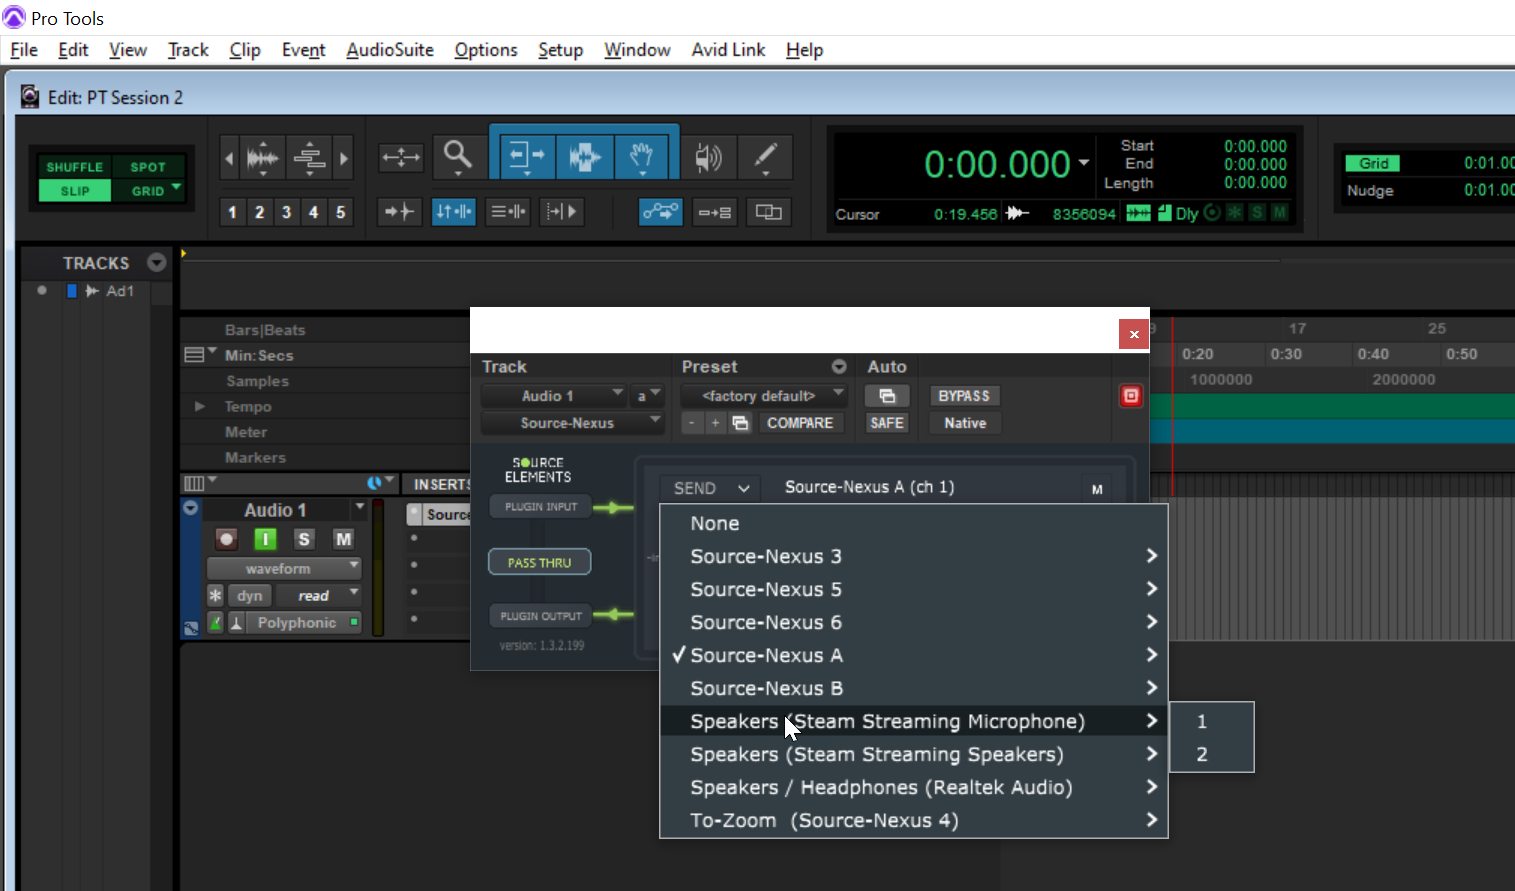
Here is an example. These are device names on Windows:
In a DAW, the Nexus I/O device will be named "To-Zoom (Source-Nexus 3)" and "From-Zoom (Source-Nexus 4"):
Therefore, if you want to use devices you created on Windows on your Mac, you will need to rename them through the Source-Nexus Control Panel as below:
Note: you will need to have your devices created on your Mac before you open the DAW session.