Source-Connect - User OpenVPN Firewall settings
Windows: Install OpenVPN
- Download OpenVPN from the official site ( link https://openvpn.net/client-connect-vpn-for-windows/)
- Run the downloaded file and follow the software installation instructions
Import profile to OpenVPN
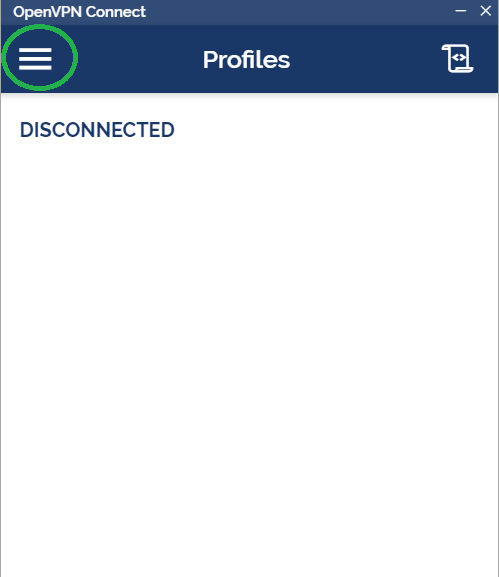
- Run OpenVPN Connect
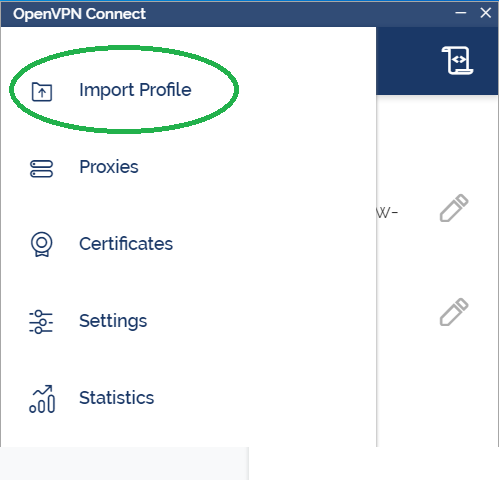
- Press “Setting” button and select “Import Profile”
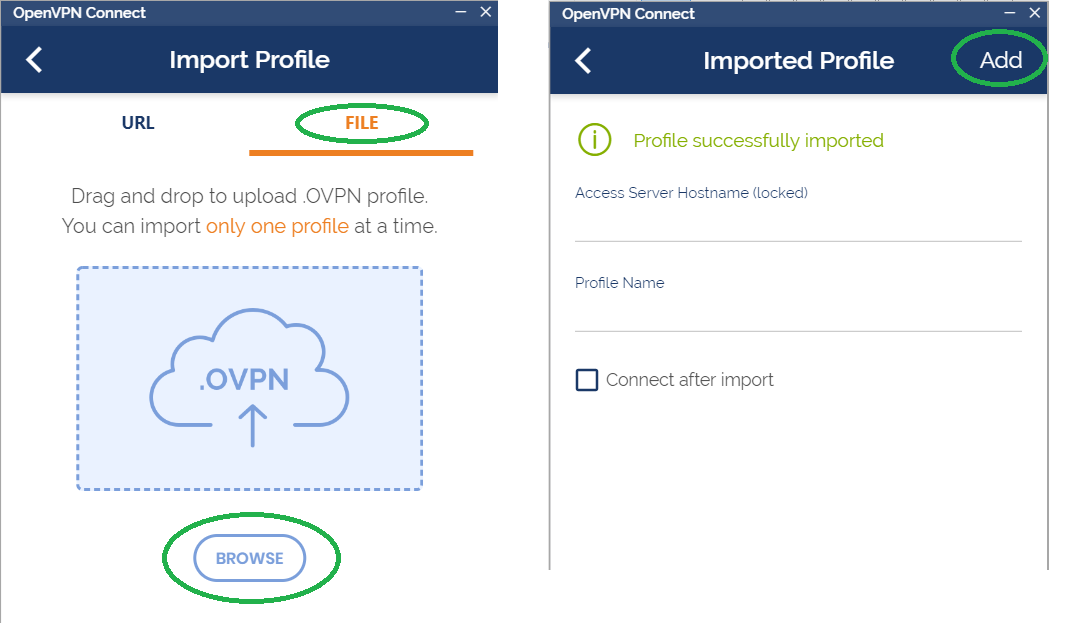
- Next select “File”, click “Browse” and select the file that you received from your vendor, then click “Add”.
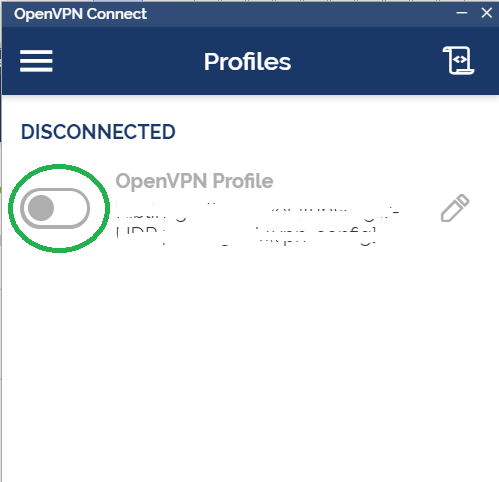
- For connect via VPN, please turn on switch
Windows firewall settings for forwarded port
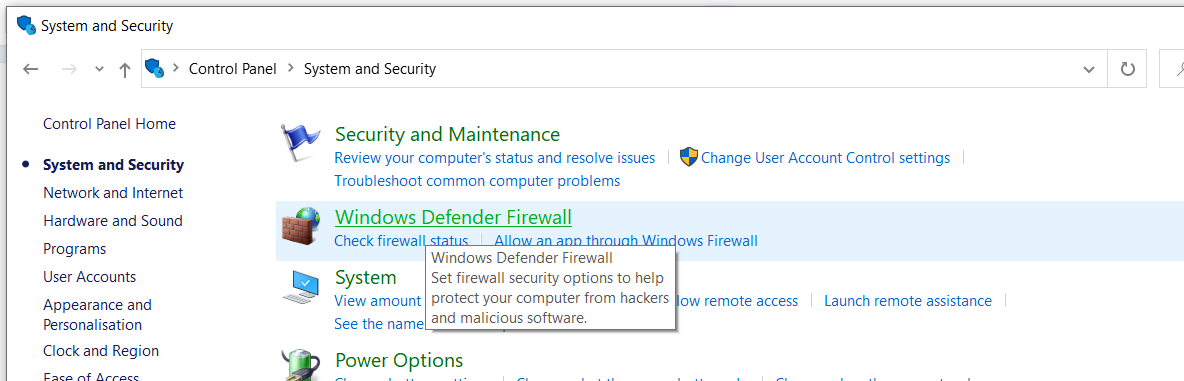
- Open Windows Defender Firewall (Control Panel > System and security > Windows Defender Firewall) to add new firewall rules.
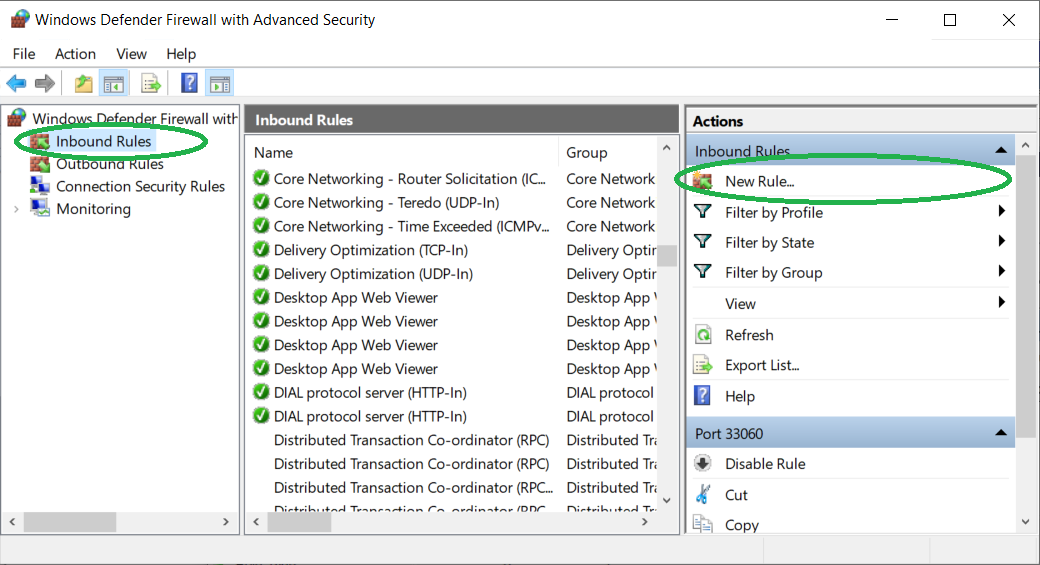
- In Windows Defender Firewall window select “Advanced Setting” on the left panel

- Select “Inbound rules” on the left panel then “New Rule…” on the Action Panel for start wizard.
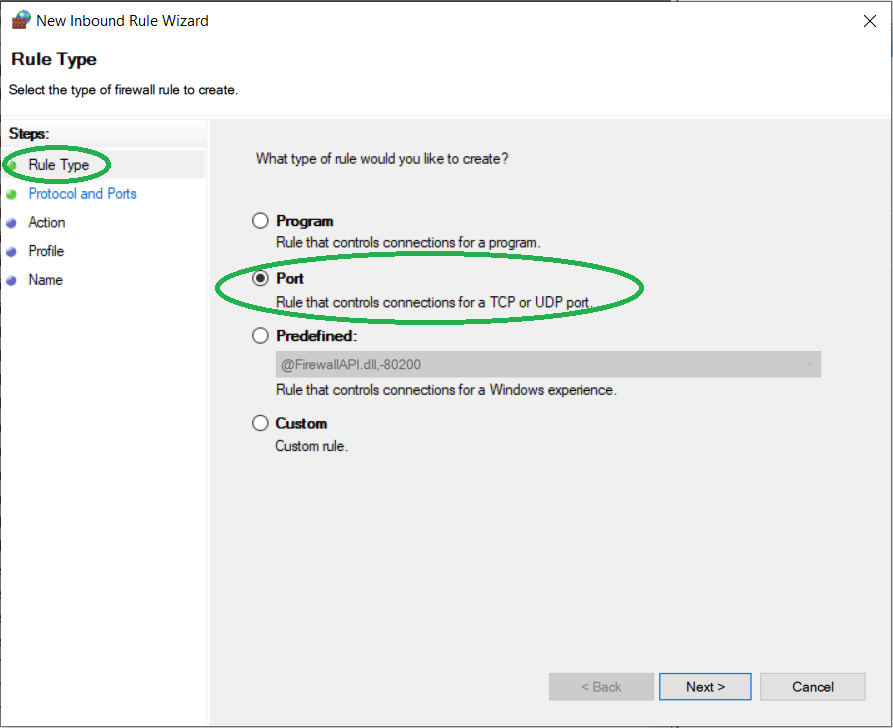
- In the “New Inbound Rule Wizard” window configure a new rule. Select “Rule type” “Port” and press the button “Next”
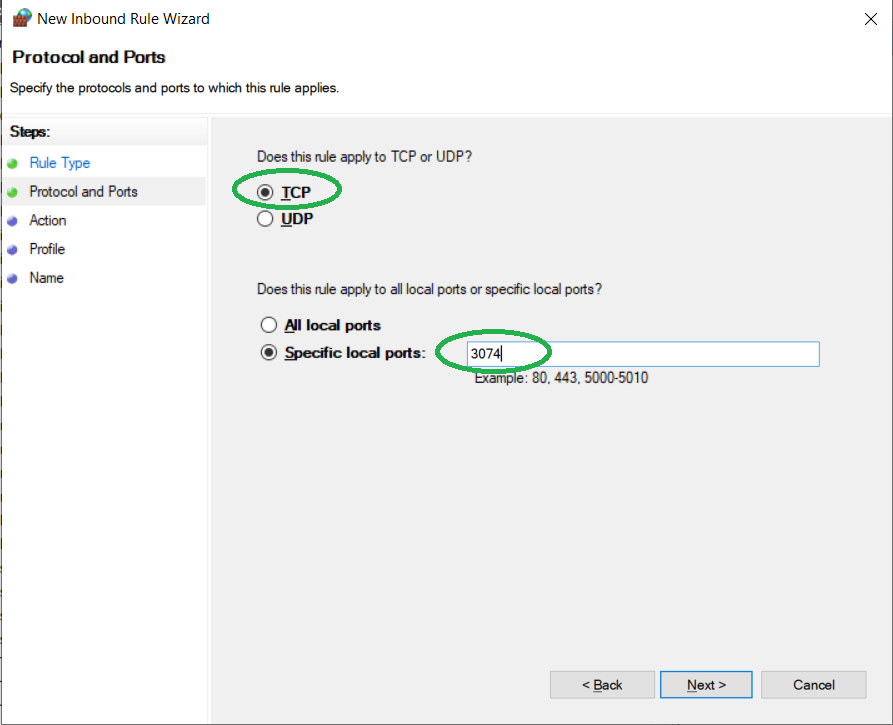
- In the next section select specify protocol (UDP/TCP) and port number.
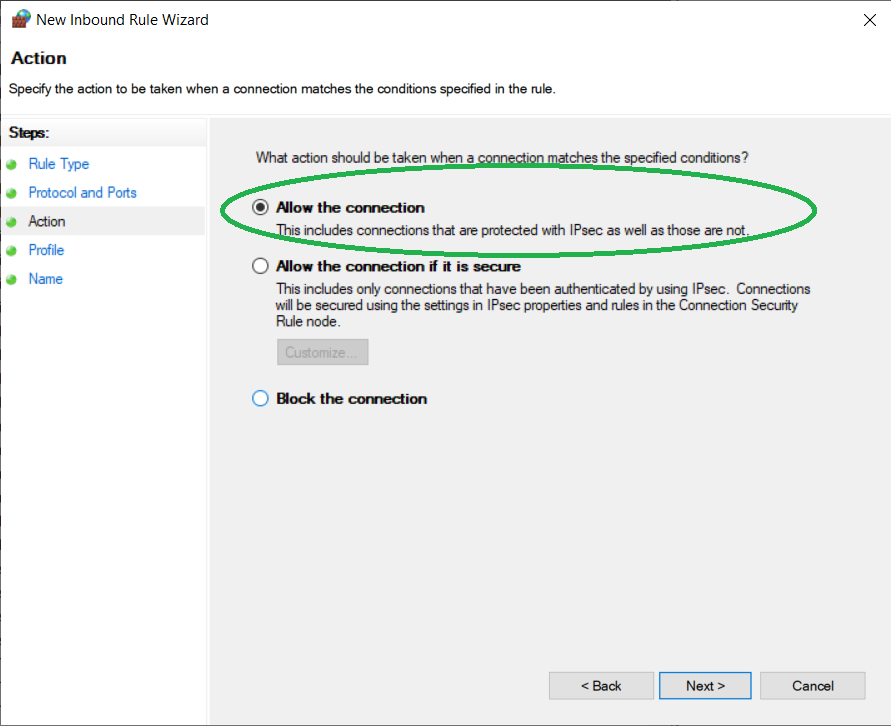
- Select option “Allow the connection” in the next section and press “Next” button
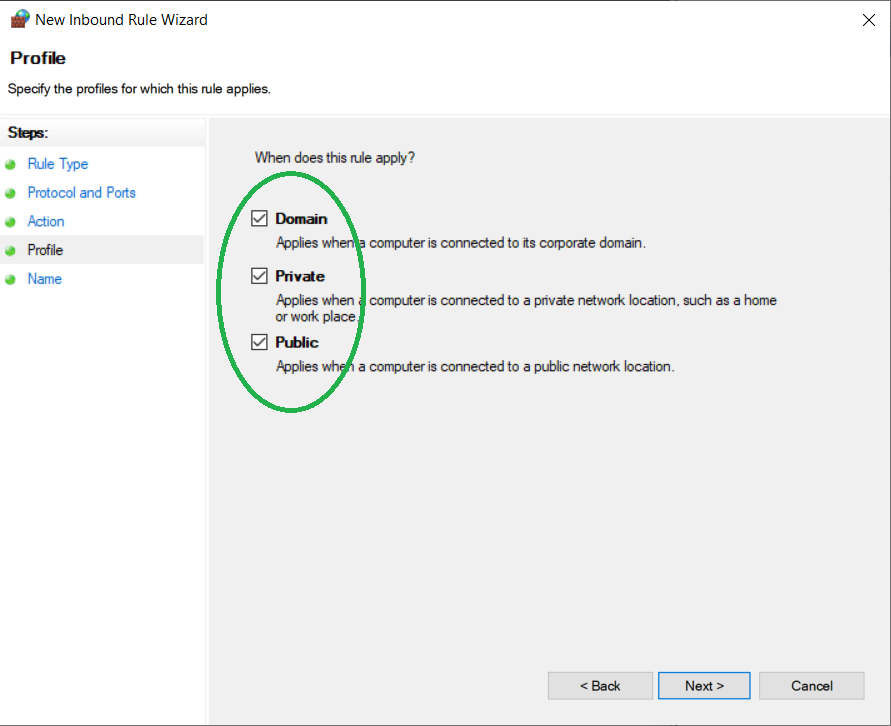
- Select option “Domain”, “Private” and “Public”
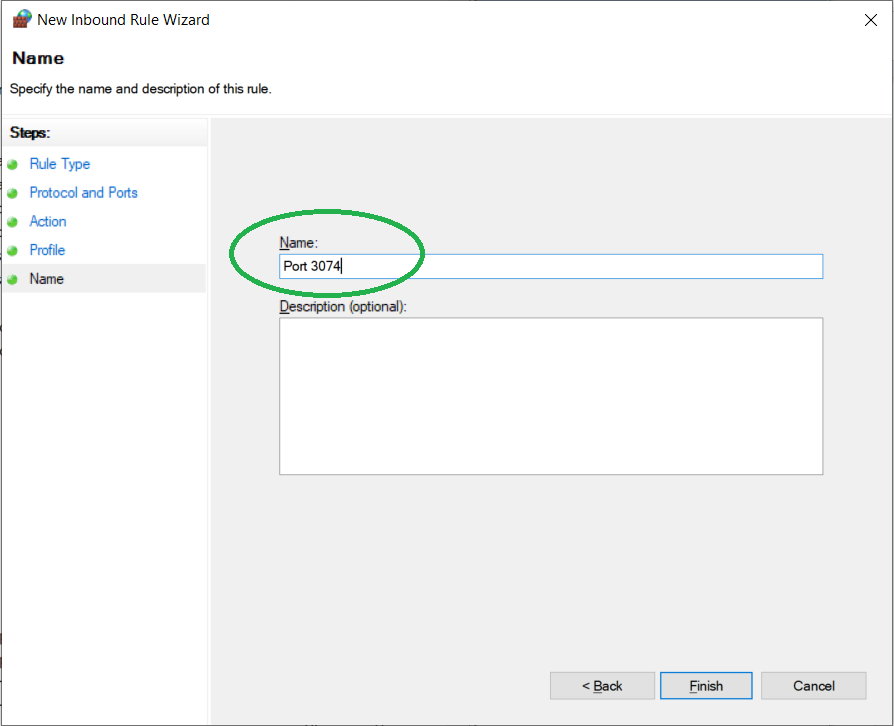
- Enter the unique rule name, e. g. “Port 3307” and click the “Finish” button.
- Repeat from step 3 if you need to add more ports (specify ports and protocol on step 5).
MacOS: Install OpenVPN
- Download the official OpenVPN Connect client from openvpn.net https://openvpn.net/vpn-server-resources/connecting-to-access-server-with-macos/
- Install software, follow the software installation instructions. You can see the detailed instructions on the page https://openvpn.net/vpn-server-resources/installation-guide-for-openvpn-connect-client-on-macos/
You can use alternative software e. g. Tunnelblick or Viscosity OpenVPN client. Visit on page https://tunnelblick.net/downloads.html for install Tunnelblick or https://www.sparklabs.com/viscosity/ for install Viscosity.
Import profile to OpenVPN
Select the ovpn-file that you received from your vendor and choice menu "Open with" than select the OpenVPN, Tunnelblick or Viscosity and then follow the instructions of the software that you have installed. 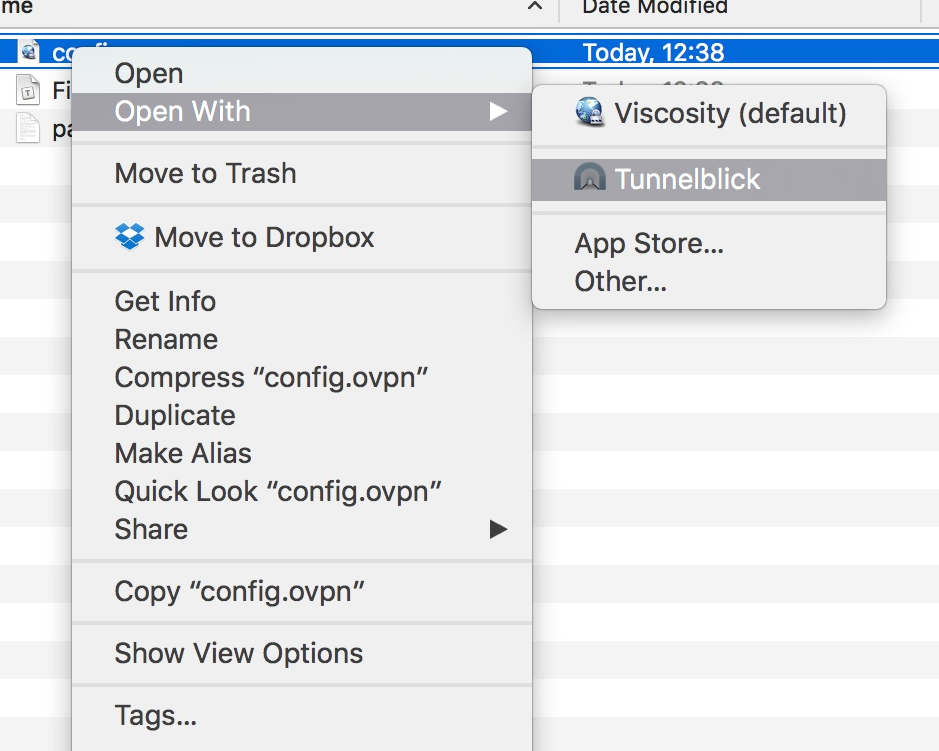
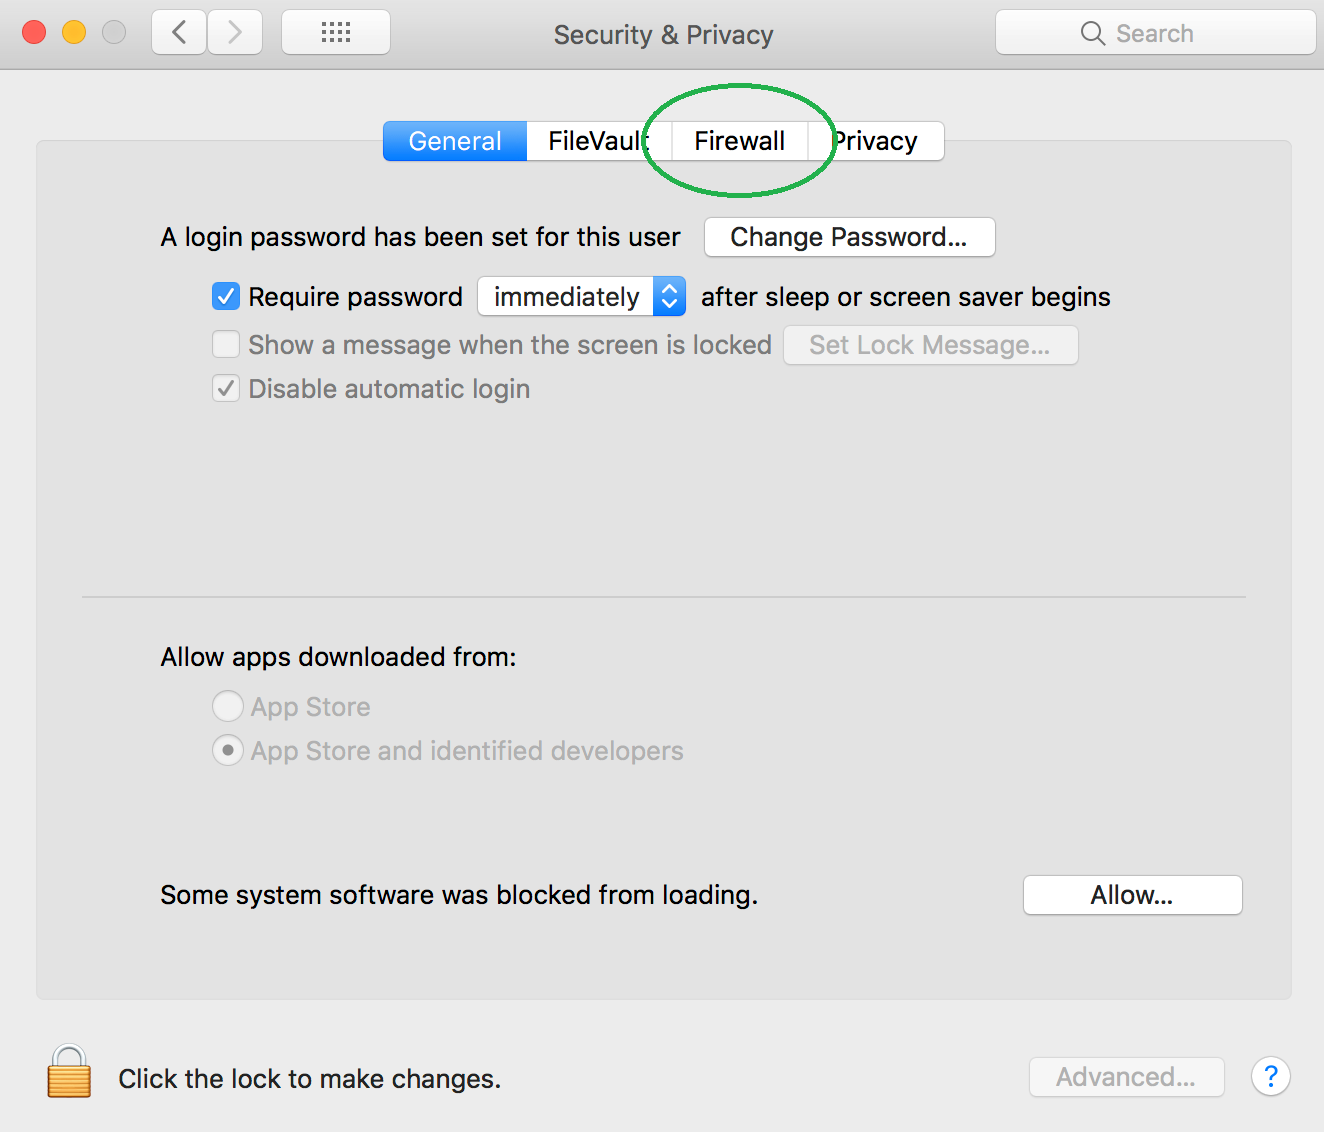
MacOS firewall settings for forwarded port
- Check the firewall settings, select "System Preferences" -> "Security" from the Apple menu, click on the "Firewall" tab.
- If the firewall is turned on, click the Firewall Settings button, and then click the Add Application (+) button to allow incoming connections for your software.
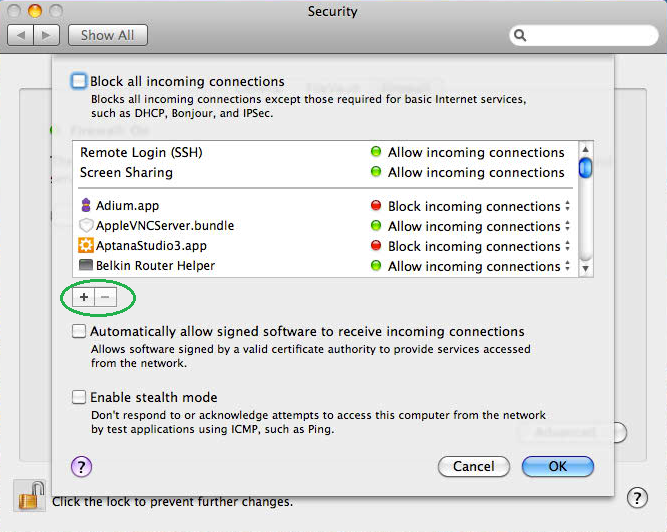
Table of Contents