Capturing an Input Device with Source-Live Pro LL
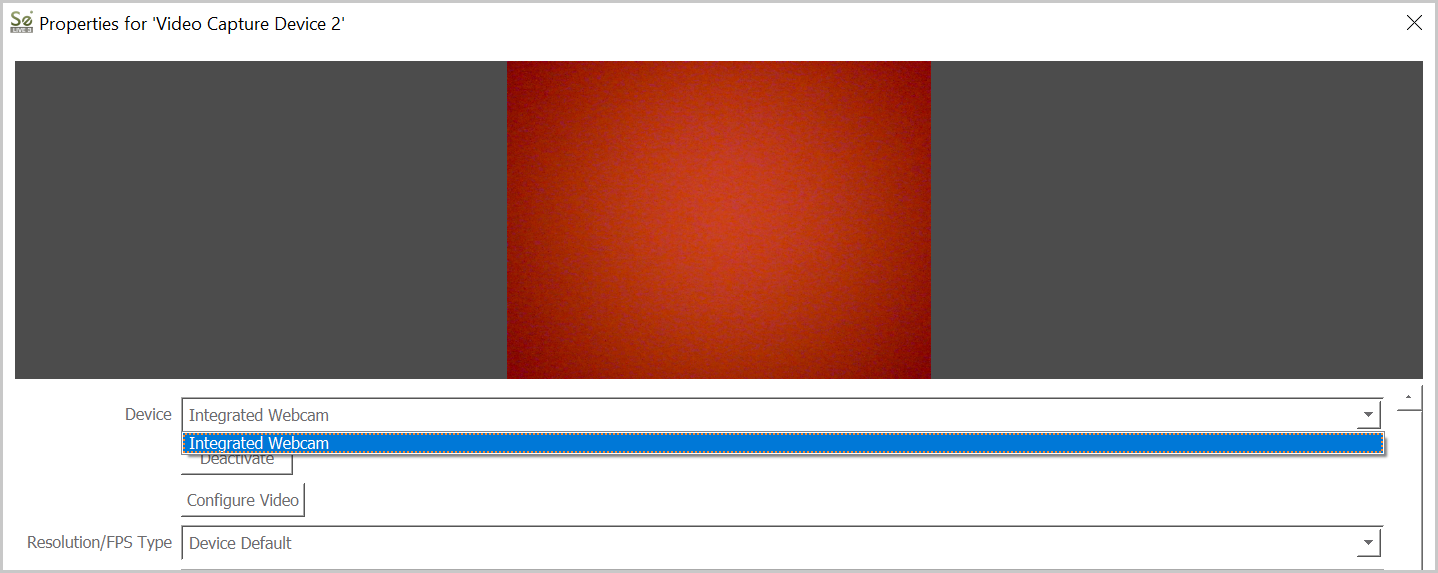
This article contains information about Source-Live Pro LLSource-Live allows you to connect any camera devices for streaming. These will appear when you click Sources > Capture Input device in the "Device" dropdown.

The most important setting when capturing your device is setting up the resolution level, which you can configure in the Resolution/FPS Type (you can use the default option or configure a custom one). Whether or not your remote viewer will get an excellent stream depends on this setting and your available bandwidth: make sure to check this setting along with the Resolution option in the settings panel. Ideally they should be the same for the best picture quality.
If you wish to configure a different frame rate than the preset one, uncheck the "Custom" option.

Refer to the "approximate bandwidth requirements" section at the bottom of this article to find an approximate required bandwidth for each quality level for the broadcaster’s upload and the viewer’s download.
In Windows, you can also configure the following settings:
- Deactivate: deactivate your video for an audio-only broadcast session.
-
Configure your Video: configure specific properties, including the following settings. You can always set the values back to "Default".
-
Video Proc Amp (processing amplifier). Please note that the settings might be disabled if not supporte by your video device.
- Brightness: move the brightness slider to the left or right to adjust the brightness of your video. By deafult, the value is set to 0.
- Contrast: move the slider to the right to adjust the contrast of your video. By default, the value is 0.
- Hue: move the slider to the right or left to vary your video's color by the varying degree of hue. By default, the value is set to 0.
- Saturation: move the slider to the left or right to adjust (purity) of the video. By default, the value is 64.
- Sharpness: move the slider to the left or right to adjust the sharpness of your video. By default, the value is set to 2.
- Gamma: move the slider to the right to adjust your video's gamma (transitions from black to white and grays in between). By default, the value is set to 100.
- White Balance: move the slider to the left or right to adjust your video's white balance. By default, the value is set to 4600.
- Backlight Comp: move the slider to the left to adjust the composition of your video's backlight. By default, the value is set to 3.
- Gain: move the slider to the right to adjust your video's gain.
- ColorEnable: check the box to turn off your color.
- PowerLine Frequency (AntiFlicker): depending on your equipment, you can adjust the power line frequency. For most US equipment, this is 60Hz.
-
Camera Control. Please note that the settings might be disabled if not supported by your video device.
- Zoom: move the slider to adjust the zoom of your camera.
- Focus: move the slider to adjust the focus and recalibrate your camera.
- Exposure: move the slider to adjust the exposure to light of your camera.
- Aperture (Iris): move the slider to adjust your camera's aperture.
- Pan: move the slider to adjust the camera's pan (horizontal movement).
- Tilt: move the slider to adjust the camera's pan (vertical movement).
- Roll: move the slider to adjust your camera's roll.
- Low Light Compensation: check the box to compensate for low light in your environment.
-
Video Proc Amp (processing amplifier). Please note that the settings might be disabled if not supporte by your video device.
-
Resolution/FPS Type ("Device Default" or "Custom")
- Resolution: only available if "Custom" is selected.
- FPS: configure the number of frames per second; by default, this setting will be 30. The higher the frame, the higher video quality. The amount of FPS has a direct impact on CPU usage as well. Keep in mind that unless your viewers have high-refresh rate screens (as high as the FPS), they will not be able to display additional frames.
- Video Format: configure the recording's video format.
- Color Space: default, BT.709 (the new standard for HD video) or BT.601 (SD).
- Color Range: default, partial (16-235) or full (0-255).
- Buffering: auto-detect, enable, disable. buffering.
- Flip Vertically: check the box to flip your camera vertically.
-
Audio Output Mode:
- Capture audio only
- Output desktop audio (DirectSound)
- Output desktop audio (WaveOut)
- Use custom audio device: check the box to use a custom device connected to your computer or laptop (for example, Realtek Audio, Steam Streaming Microphone, plugged in microphones).
Approximate Bandwidth Requirements

- 1920x1080: 1.6mbs
- 1280x720: 1.2mbs
- 960x540: 0.9mbs
- 854x480: 0.7mbs
- 640x360: 0.45mbs
- 426x240: 0.3mbs
The average home-level DSL connection will have around 300-500kbps upload. A business-level DSL or Cable connection may have 2mbs upload. Fiber-optic connections can have more than 100mbs upload.
NOTE: enable “Buffering” option to make sure that the video source is only called once per buffer, thus avoiding reading from the source by byte.
Table of Contents