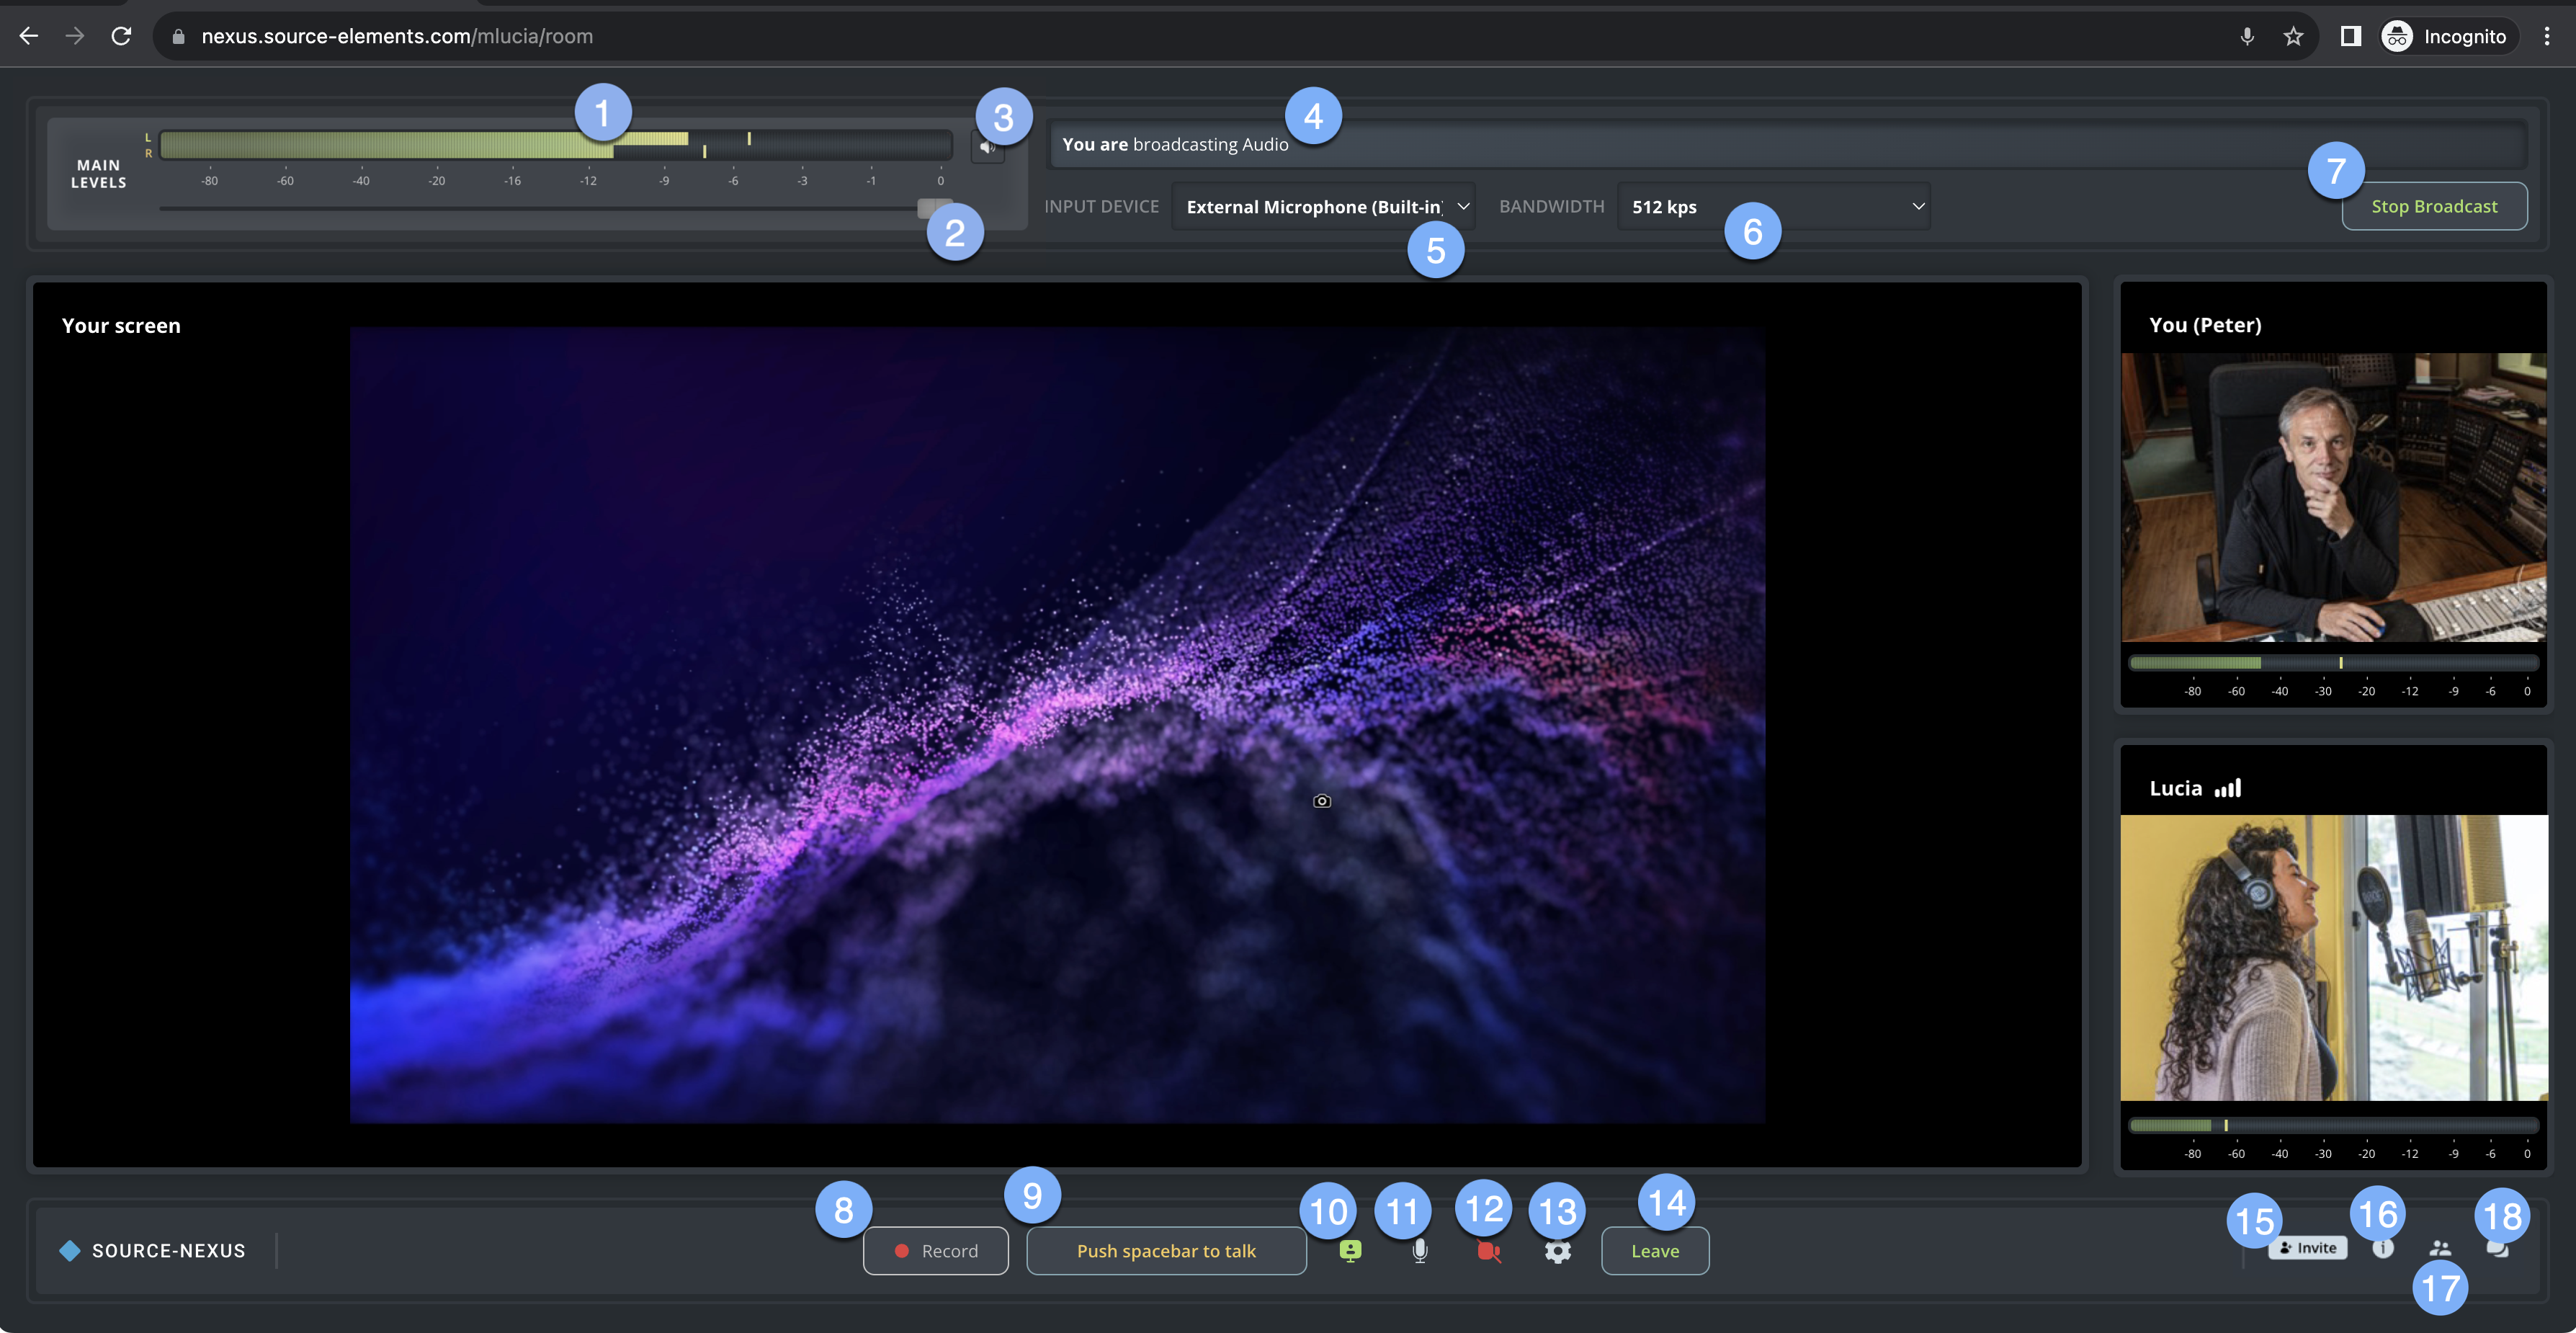
Finding your Source-Nexus Gateway controls as a broadcaster
This article is part of the Source-Nexus Gateway User GuideThe controls for the Source-Nexus Gateway can be found both on the top bar (for the interaction with the Source-Nexus Review plugin) and for the Gateway itself. Both bars are fixed and will be visible throughout the call.

There are six controls specific to receiving audio from an external source. The most common scenario is to use the web broadcaster together with the Source-Nexus Review plugin, but you can use any other virtual or hardware devices. You can choose any Core Audio/Windows Audio input device for the broadcast. If you have Source-Nexus Review installed, the Nexus broadcaster will automatically choose "To Nexus Broadcast" as the input device, assuming you will be sending audio from the plugin in your DAW.
- External audio indicator. If you are using the Source-Nexus Review plugin, and the configuration is correct, you will see stereo signal coming into the web broadcaster. If the selected input is a mono input, the signal will also be mono. By default, the input will use channel 1 (for mono) or 1 & 2 (for stereo). There is no channel control.
- External audio volume slider. You can slide the volume left or right to adjust your volume level.
- External audio mute button. If you wish to completely mute the audio, you can click this button.
- Broadcast status. The current status of your broadcast. When your broadcast has not yet started, you will see a message saying “Not connected”. If your broadcast is live, you will see a message saying “You are broadcasting Audio”.
- External audio input source. The source of your external audio. When using the web broadcaster with Source-Nexus Review, you will see “To Nexus Broadcast" here.
- Bandwidth. Select a specific bandwidth based on your network's quality. There are three options available in the dropdown (512kbps, for high-quality connections, 256kbps and 128kbps).
- Start/Stop broadcast. When you are ready to start broadcasting the external audio content, clicking “Start broadcasting” will make the content available to your users. Once the broadcast is active, you will see a ”Stop Broadcast” button instead.
- Record. Clicking this will record your audio (only yours), for a maximum of 90 minutes. After stopping, a .wav file will be downloaded to your computer.
The following is a list of all other controls in the web application:
- Push to talk. Pressing the spacebar will allow other participants to hear you, even if you are muted. When your talkback microphone is open, the button will be yellow and read “Release spacebar to mute” instead.
- Sharing panel. When screen sharing is on, the indicator will be green. If no screen is being shared, the indicator will be gray instead.
- Mic on/off. This button will allow you to turn your microphone on/off. This is not a toggle - unlike the push to talk button. You can configure your microphone in the Chat Settings.
- Camera on/off. This button will allow you to turn your camera on/off for other participants to see you. You can configure your camera in the Chat settings (button 13).
-
Chat settings. The chat settings menu allows you to both enable and change your:
Microphone (output).- Camera device.
- Speakers (input) - these cannot be disabled.
- Leave video chat. Clicking this button will remove you from the call. All remaining participants will see a message saying the session is no longer active.
- Invite viewers. Clicking this button will open a modal which allows you to share your room link and send it to one or multiple users.
- Host information. This will include the host's name and profile information, if they have chosen to share it publicly.
-
Participants list. This section will allow you to send messages to other participants during the call.The participants list section will list all participants - including those that do not have their cameras on. There are two additional settings for broadcasters:
- Mute individual participants.
- Block participants
- In-call messages.