Capturing a Screen with Source-Live Pro LL
This article is part of the Source-Live Pro LL User GuideTo capture one of your screens completely, select the “Capture Screen” option when selecting a video source. If you have only one screen, it will be Display 1.
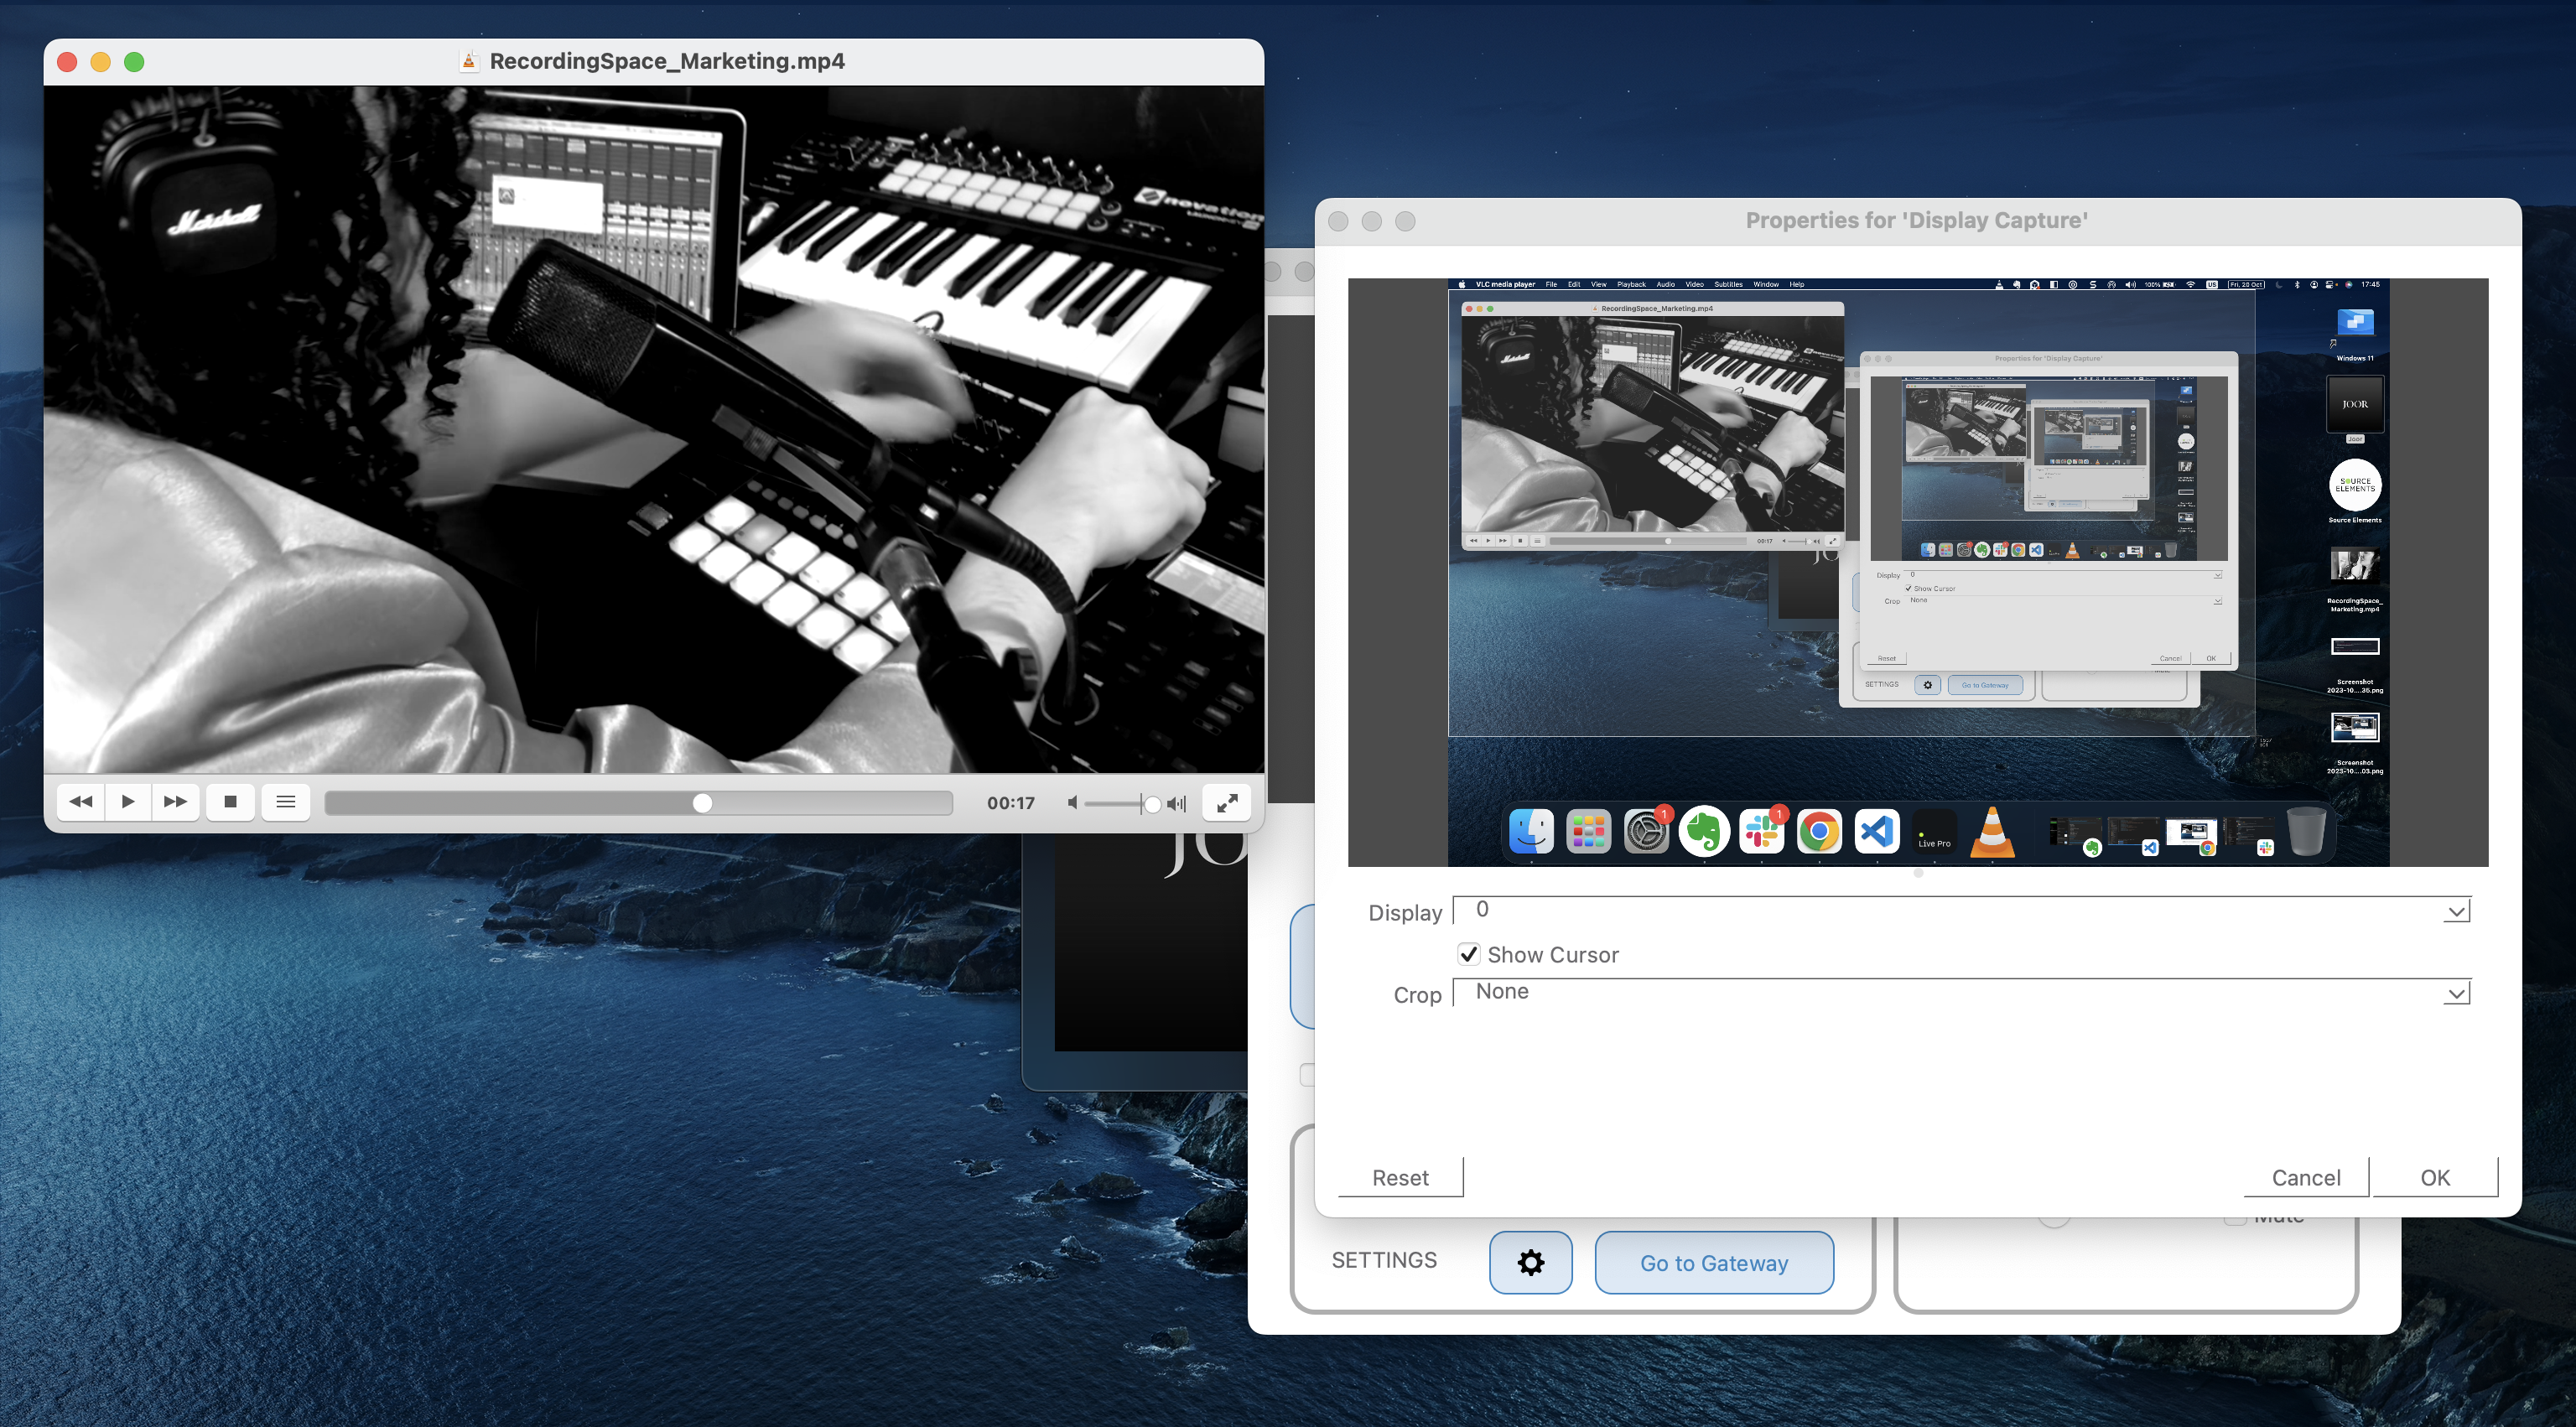
You can configure additional settings for the screen you are casting, including:
- Display: if you have multiple screens, select the screen you want to stream.
- Show Cursor: select whether or not the system cursor will be displayed in the stream.
-
Crop: if you want to show a part of your screen (in the image above, for example, just your VLC application.
- None: will display your entire screen.
- Manual: allows you to crop out the left, top, right, and bottom parts of your screen, independently of each other.
-
To Window: to a specific window on your screen.
- Show windows with empty names: to exclude the name displayed on your window.
-
To Window and Manual: to a specific window on your screen, where you can also decide to cut out parts of the left, top, right and bottom parts of the window.
- Show windows with empty names: to exclude the name displayed on your window.
How to manually crop part of your Screen Capture
The manual option is certainly the most flexible screen capture method, because it allows you to position the items on your screen, as needed, and manually crop parts out so you don't have to stress about about sharing your entire screen.
Look at the GIF below, for example.
In this example, the video was positioned into a corner where it can stay during the entire broadcast. It does not take more than 25% of the screen, which optimizes the amount of space you can use during your broadcast (instead of just having the window minimized and unchecked, for example).
You can play with the up/down arrows, or enter specific digits (as in our example) to get the portion of your screen you want your viewers to see. Once ready, you can simply click “OK”.
Table of Contents